
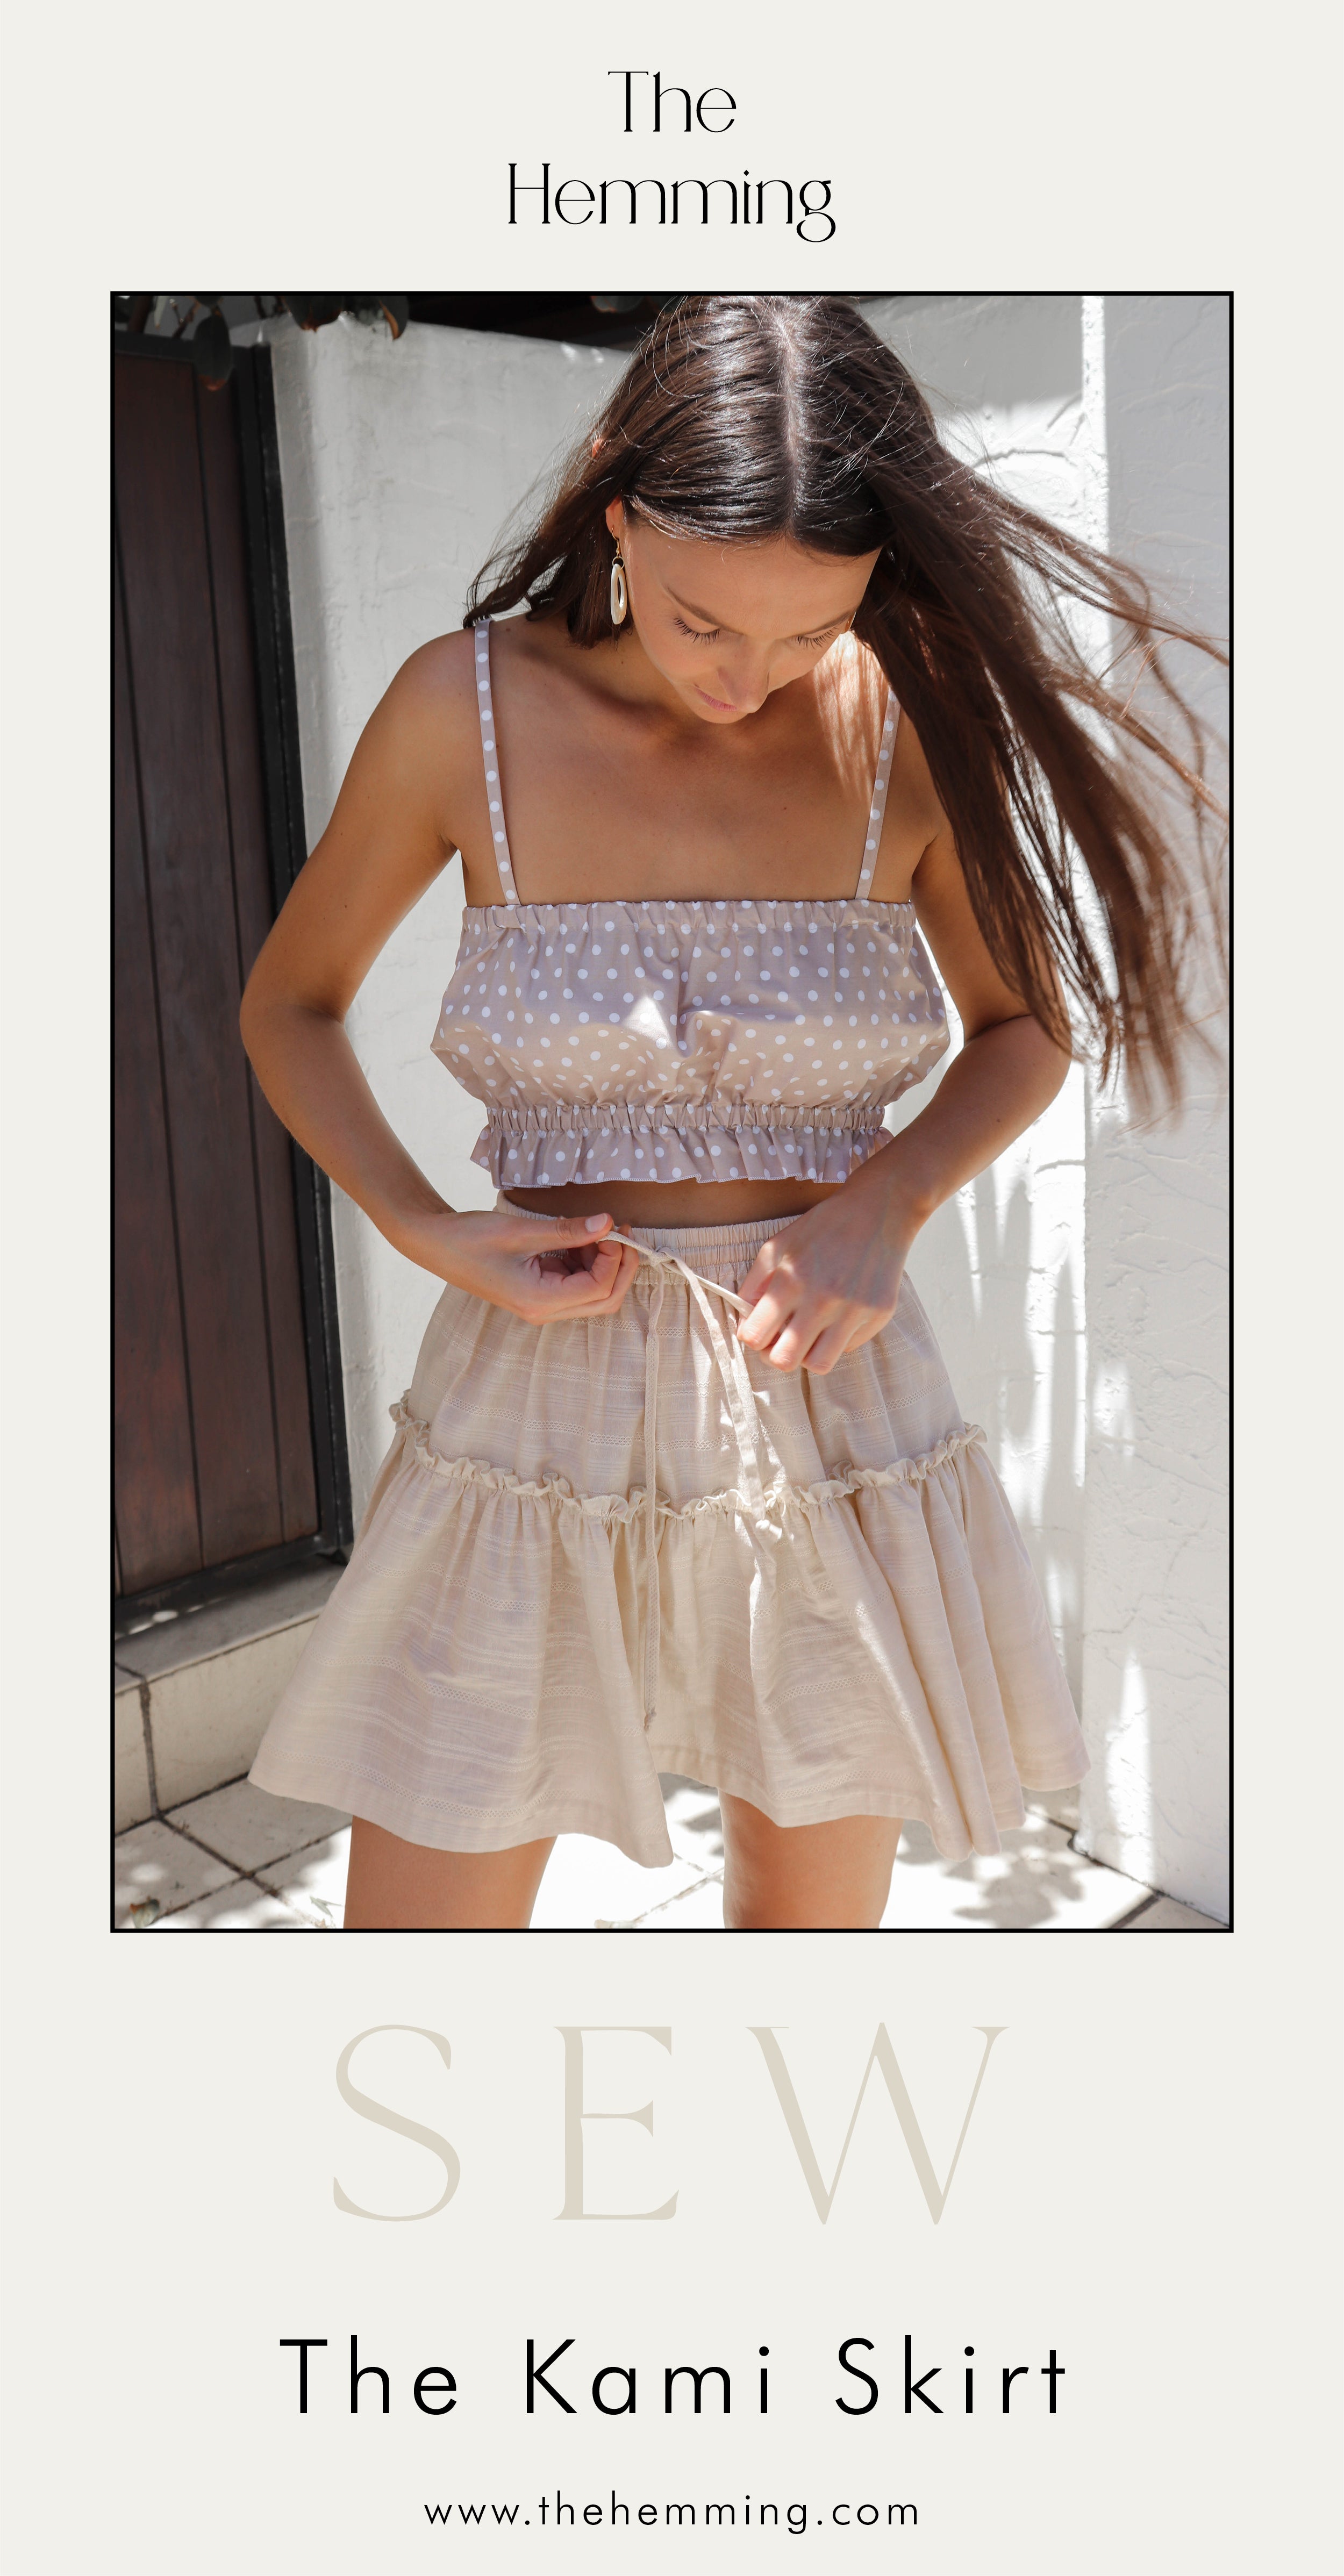
The Kami Skirt - DIY Sewing Tutorial


Introducing your new weekend sewing project, The Kami Skirt.
I have seen variations of this skirt in RTW over the last few months but have never been able to bring myself to buy one as I kept telling myself it would be an easy make. So I finally made one and loved it! So much that I made another one just to shoot the below tutorial instructions. I hope you enjoy making and wearing The Kami Skirt.
Ensure you read all the below requirements before purchasing or cutting fabric.
What you need:
- 1.5m of woven fabric
- 38mm wide elastic
- Loop turner
- Ruler/ Tape Measure
- Scissors
- Iron
Fabric & Elastic:
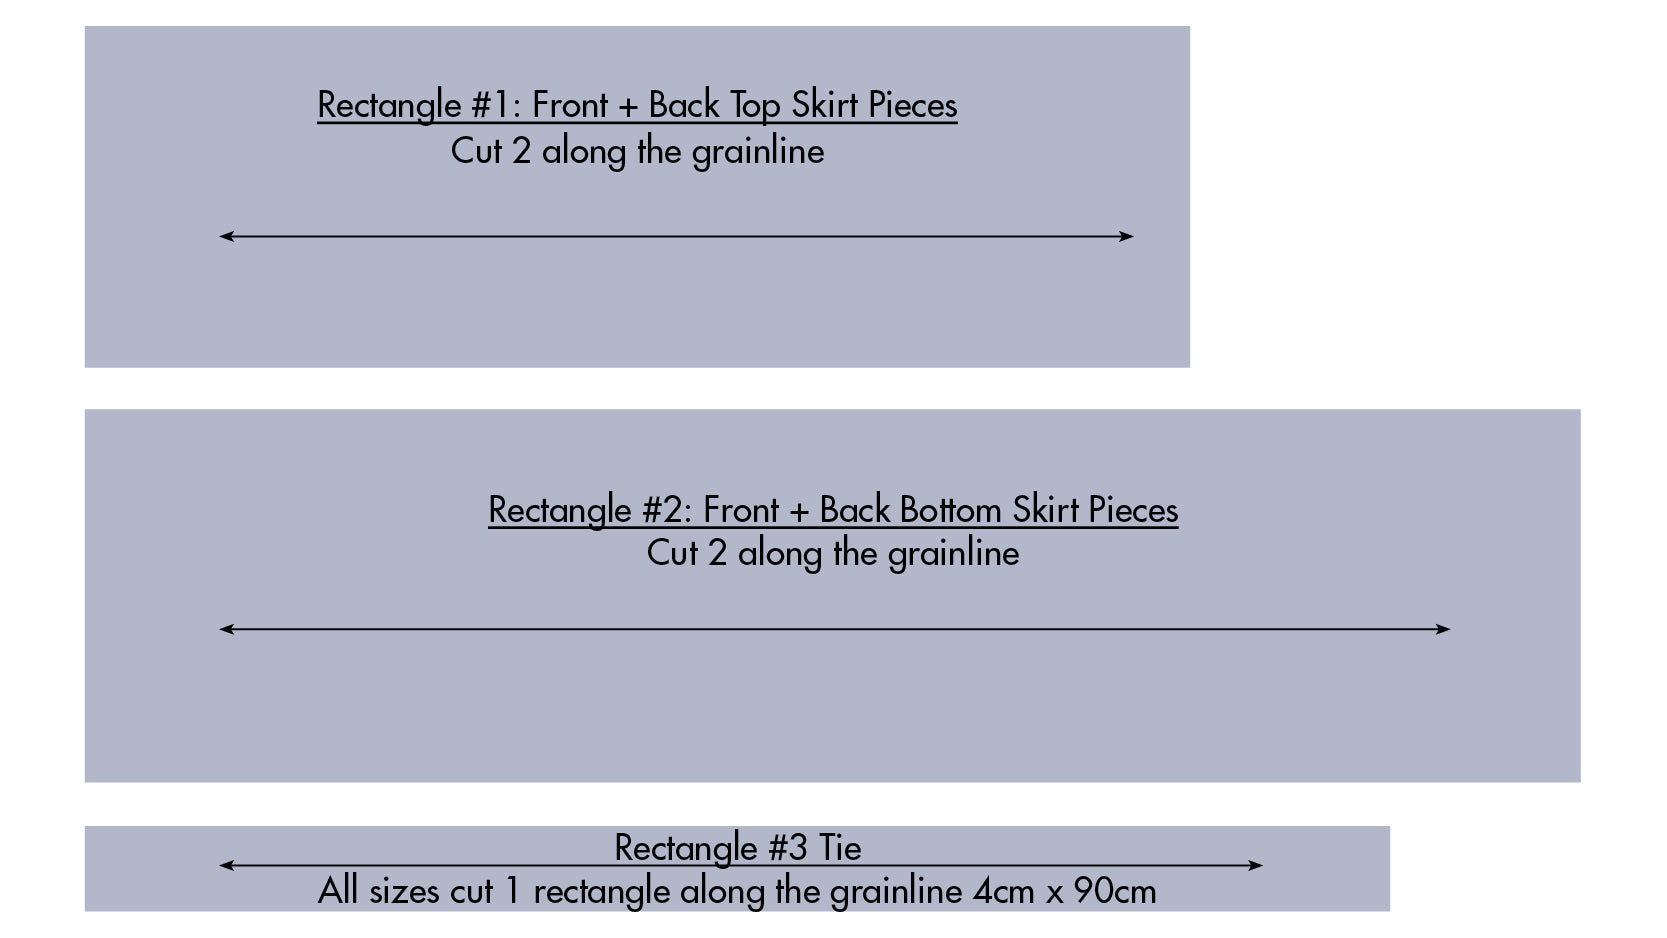
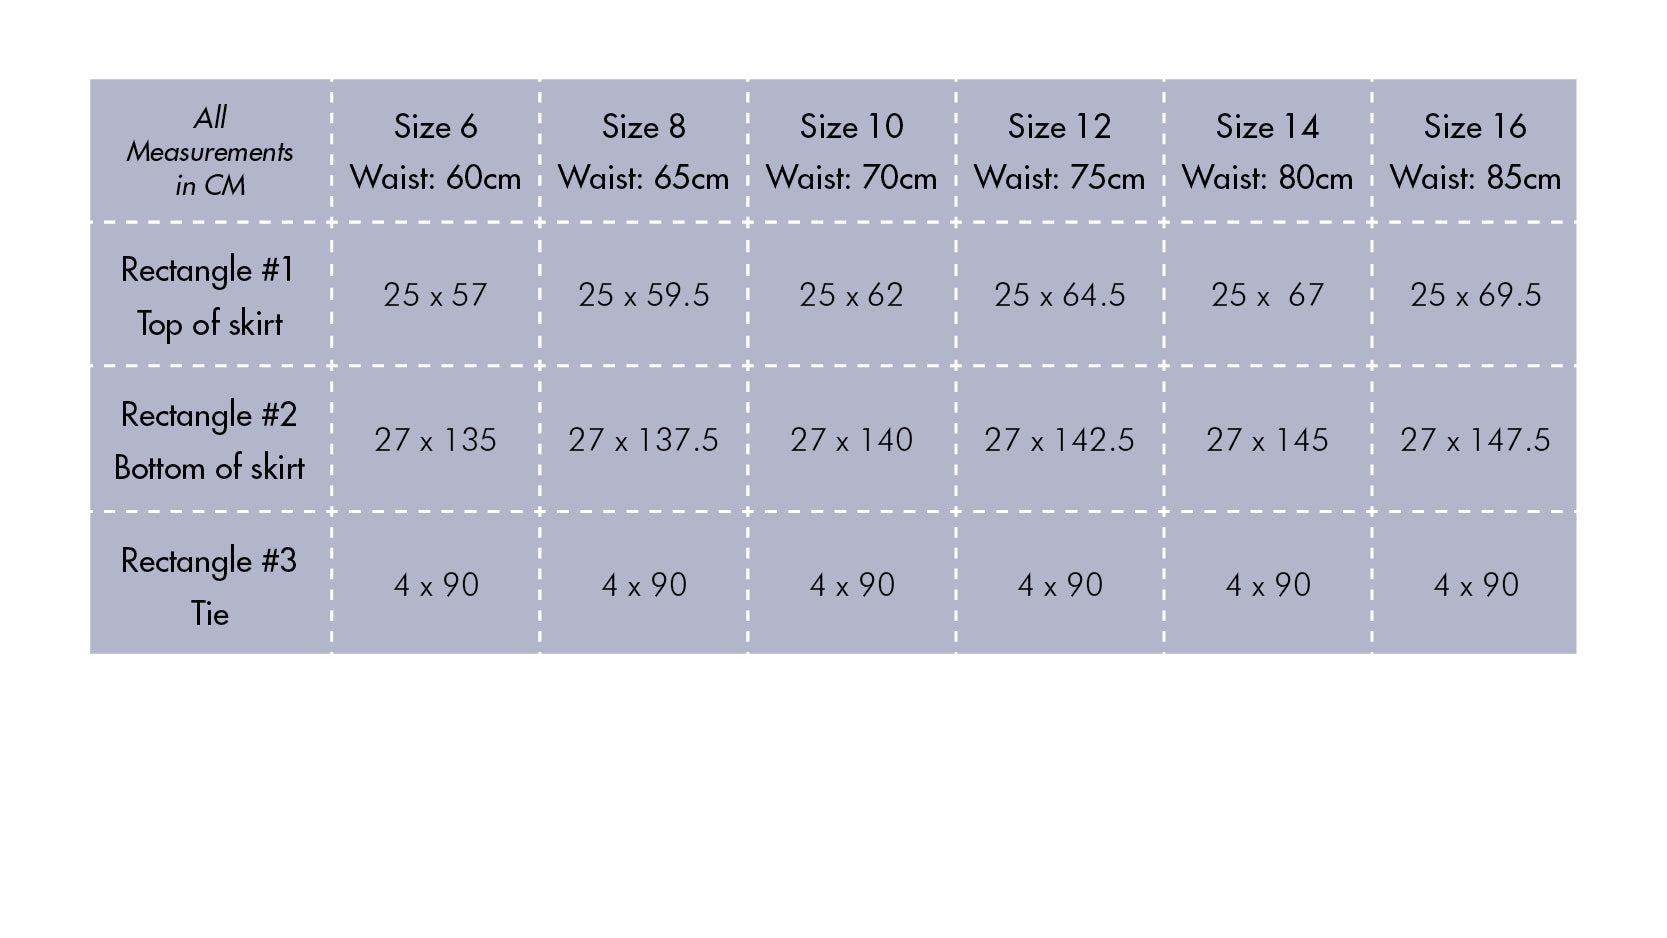
See chart below for pattern pieces. To measure elastic, wrap around the smallest part of your waist until it's tight but comfortable. If you are using 40" wide fabric ensure you cut all pattern pieces with the fabric NOT on the fold. If you are using 60" wide fabric you can cut all pieces with the fabric folded.
* This design uses an overlocker. If you do not have an overlocker, you can use close zig zag stitch to finish seams. If you want to hem instead of roll hem the bottom of the skirt (as shown in the nude version) you will need to add 2cm to the bottom of the Skirt Bottom Piece (2).
Instructions:
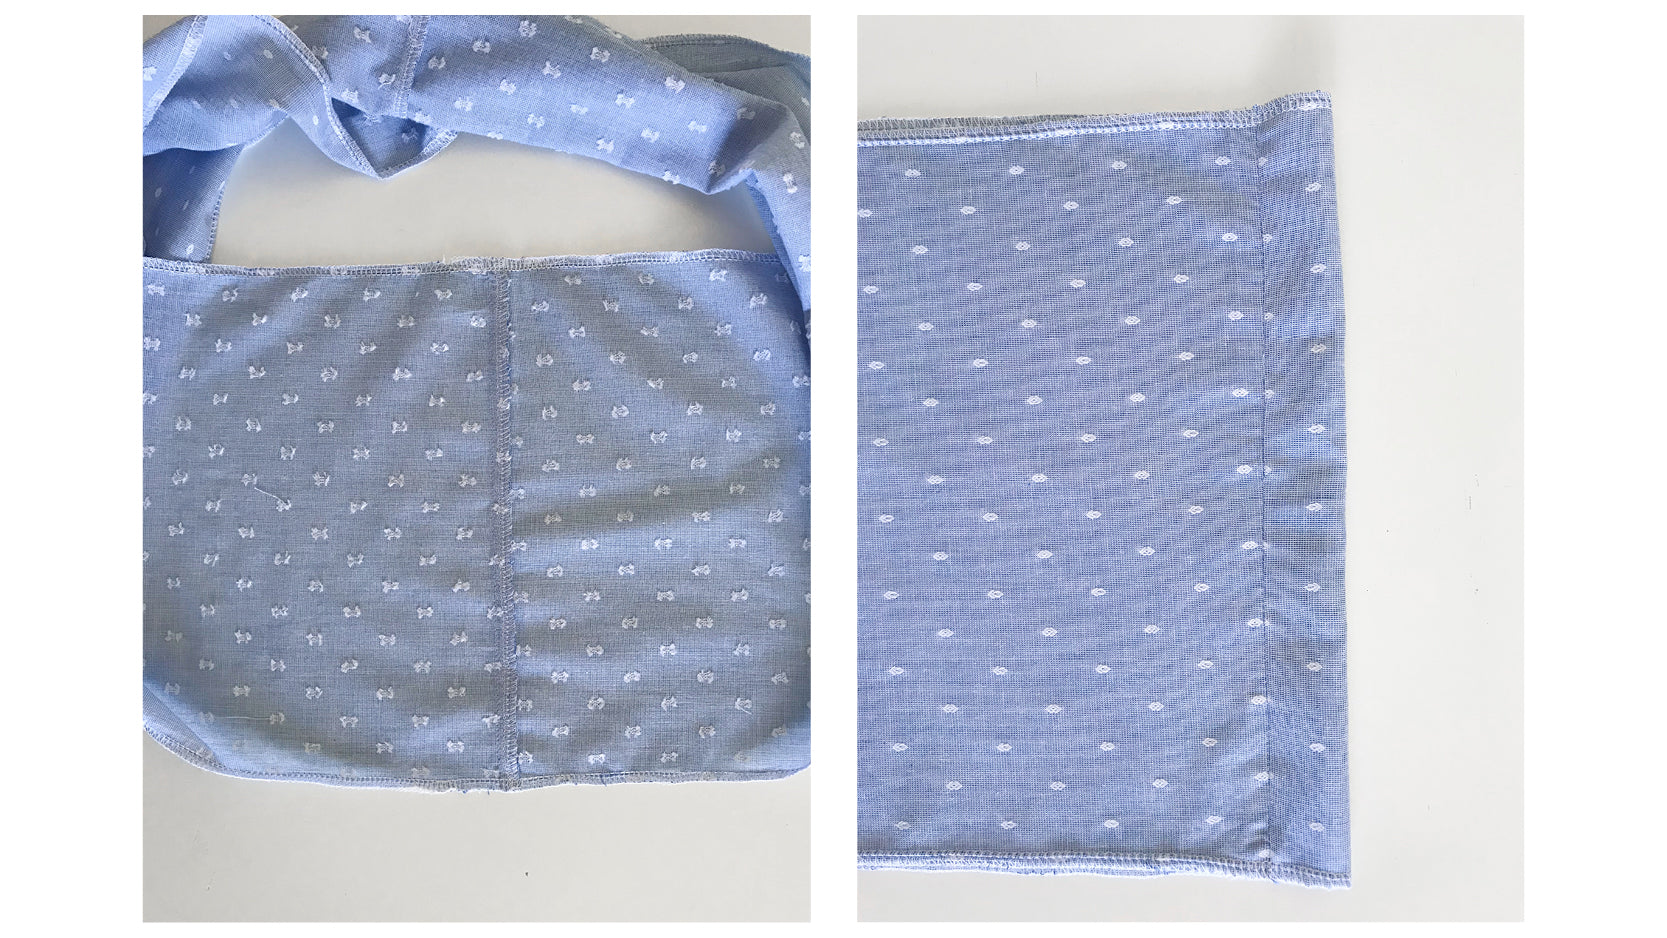
1. With right sides together sew down the short side seams of the front Top Skirt Piece (1) to the back Top Skirt Piece (1) with a 1cm seam allowance. Repeat with Bottom Skirt Piece (2).
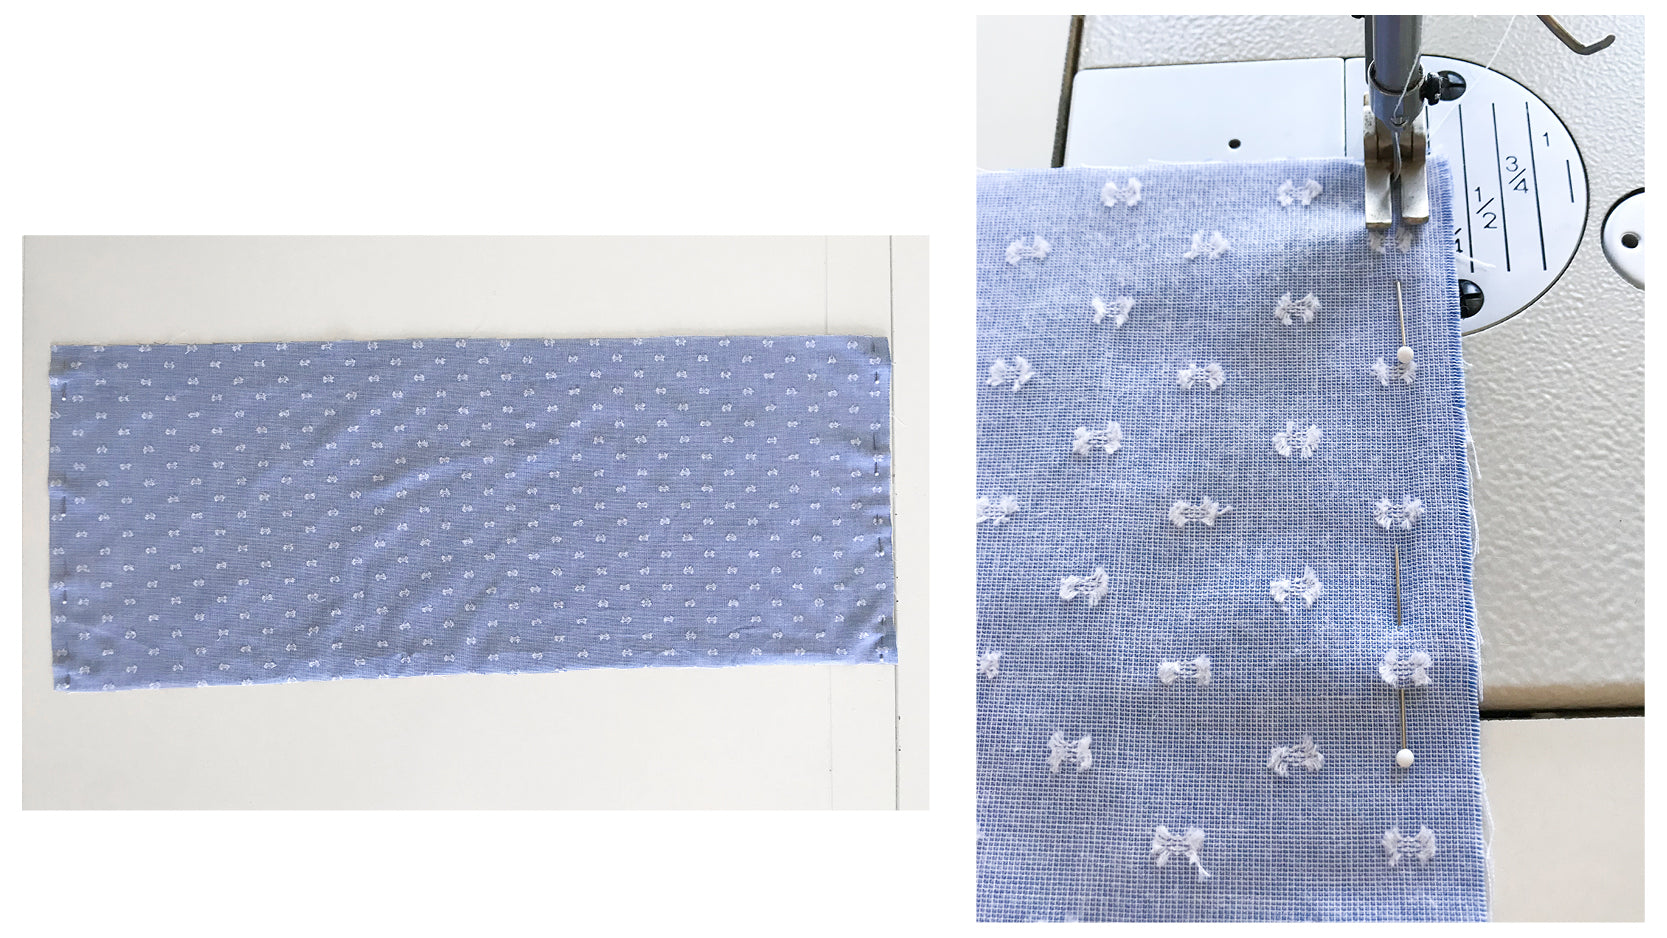
2. Overlock all 4 side seams and press towards the back.
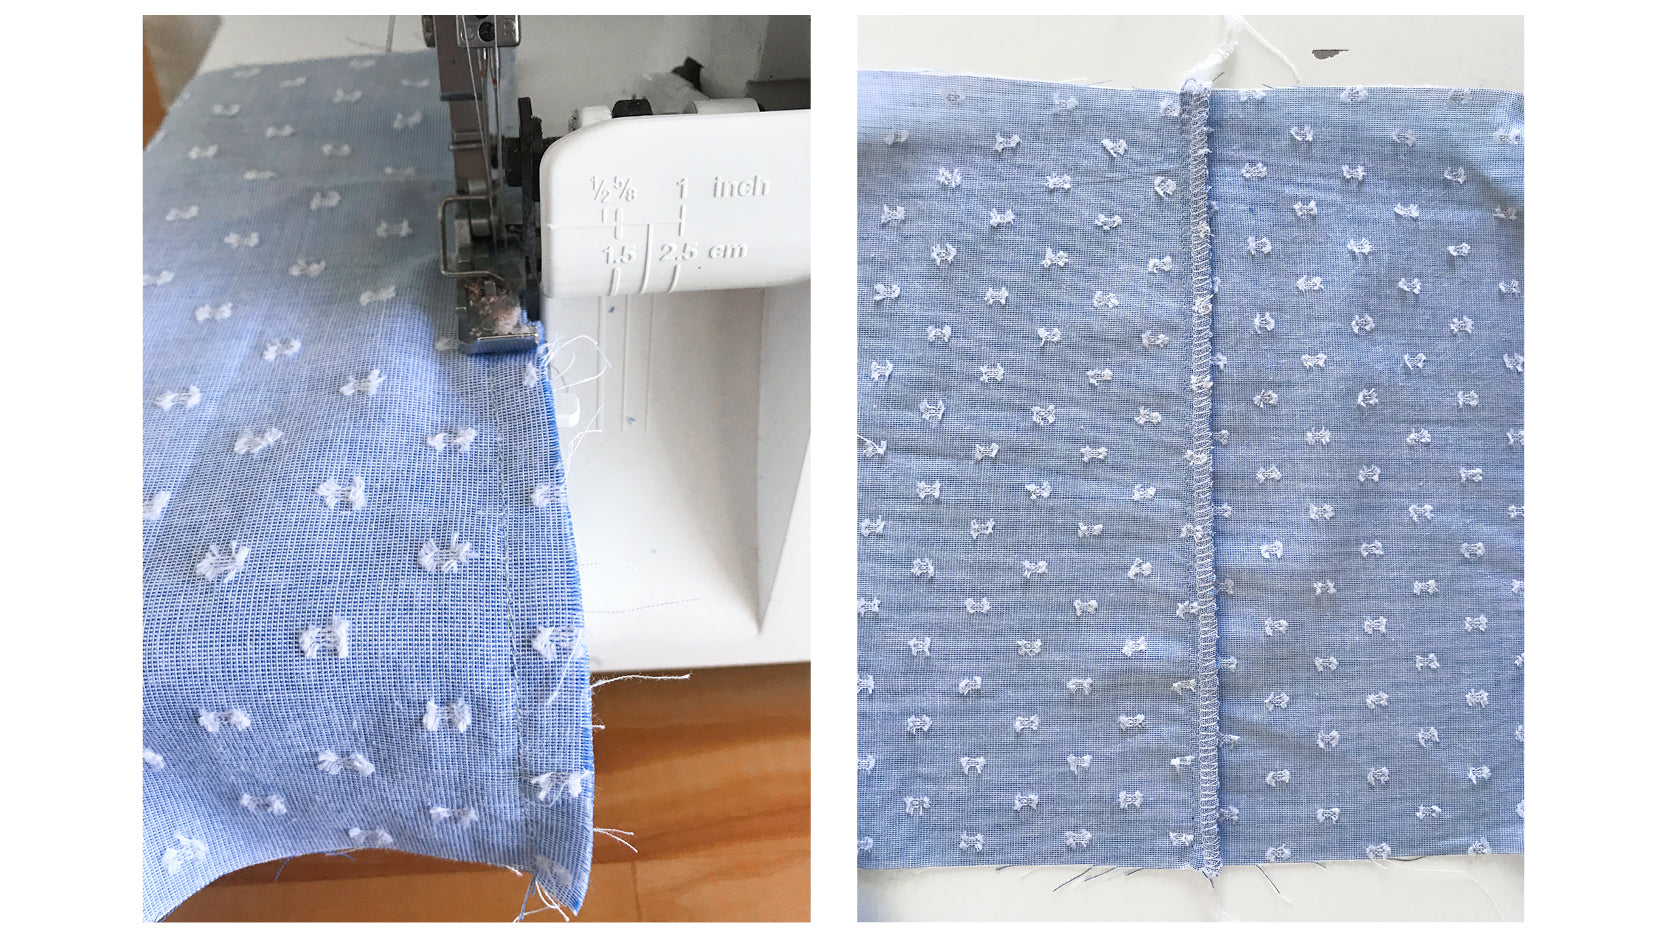
3. Overlock both long edges of the Top Skirt Piece (1).
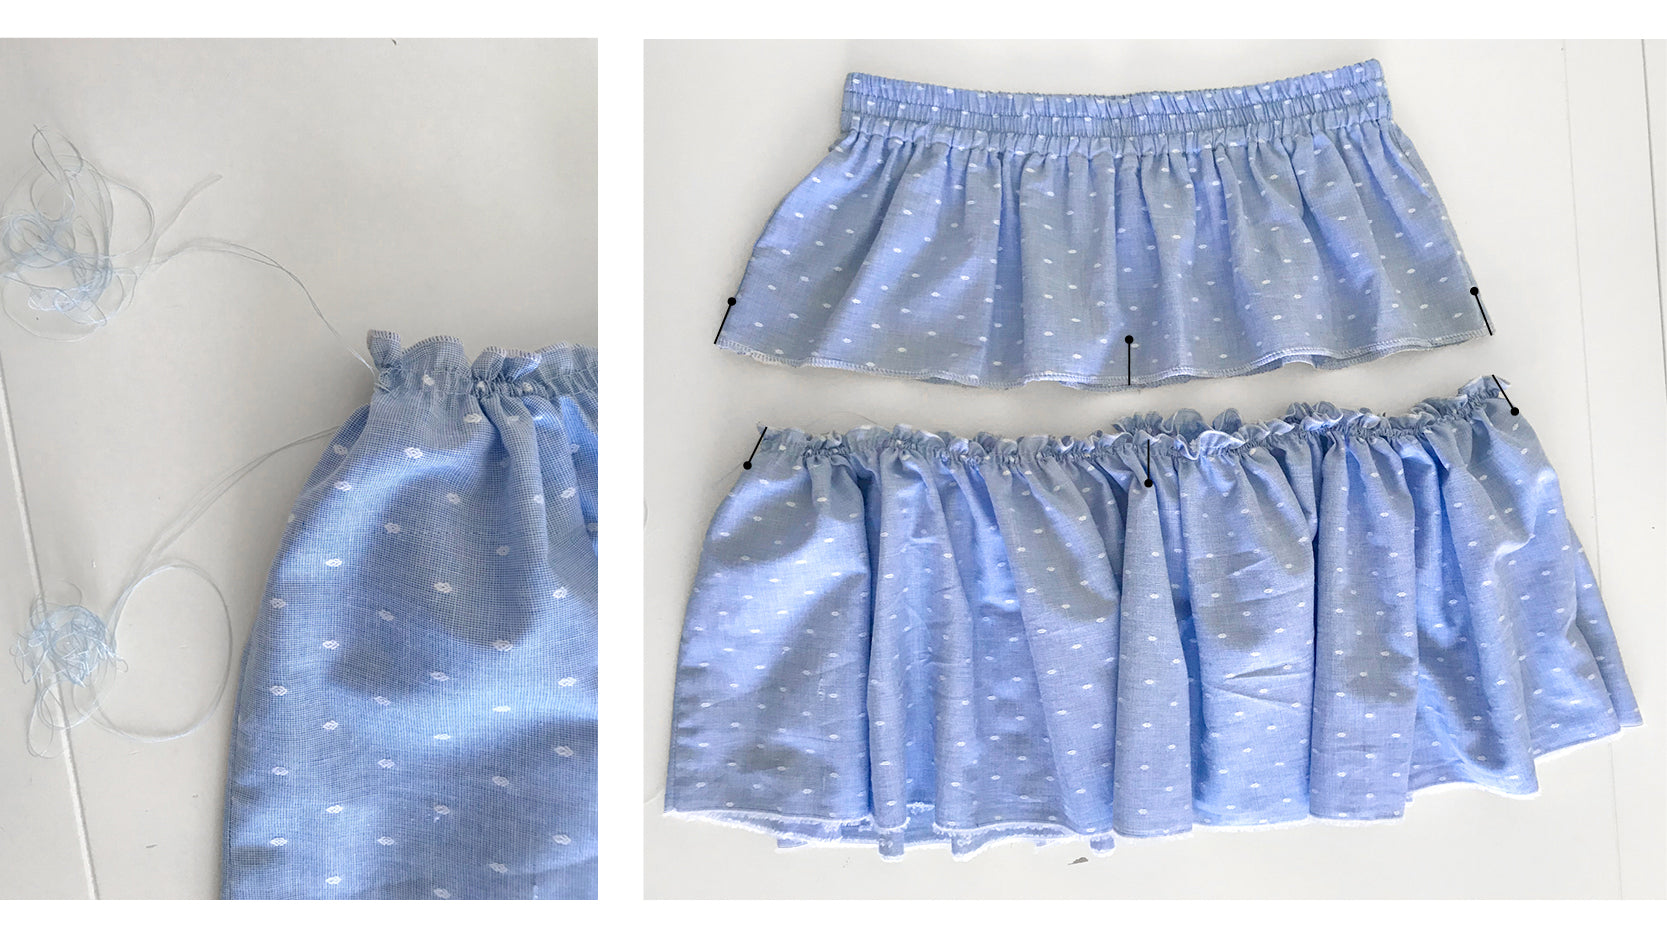
4. On Top Skirt Piece (1) Iron the top edge down to the wrong side by 4.5cm, pin in place. Then wrap elastic around your waist until it is tight but comfortable. overlap by 1cm and cut. Zig zag stitch the elastic ends together and trim excess elastic.
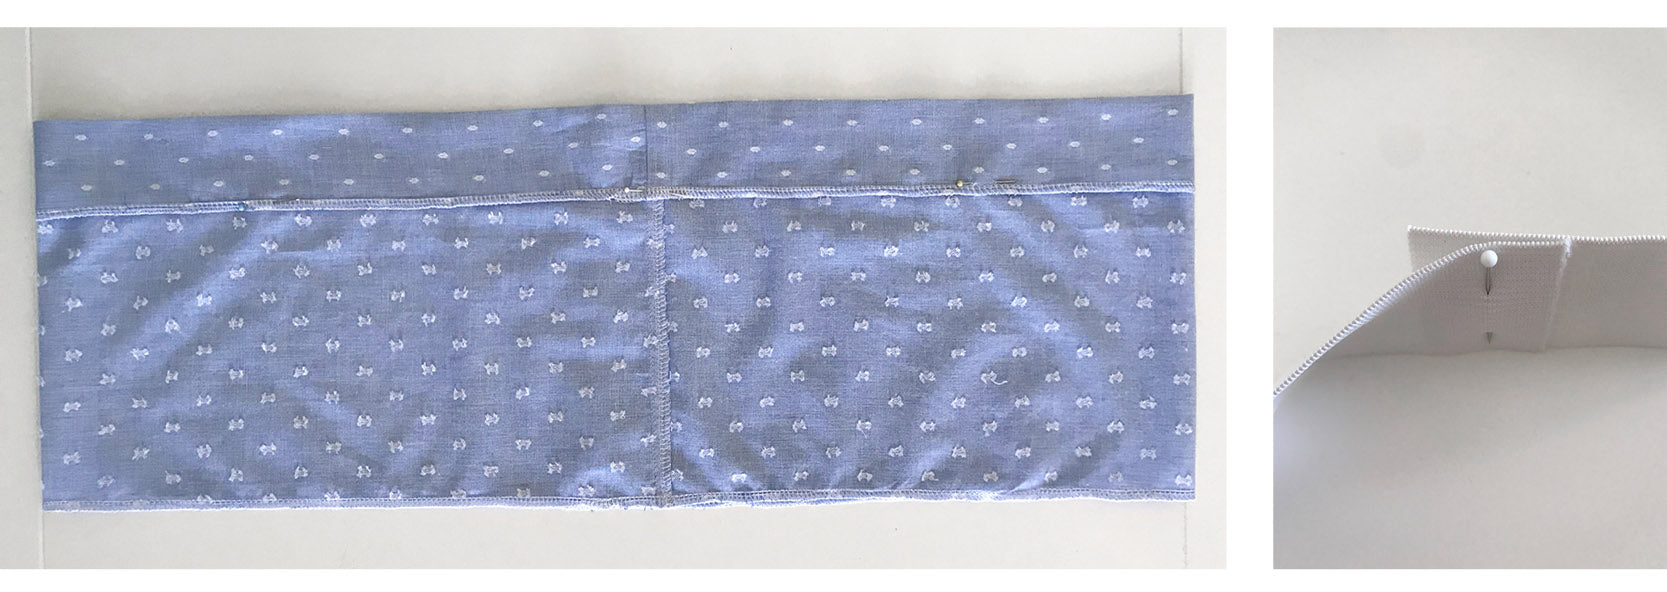
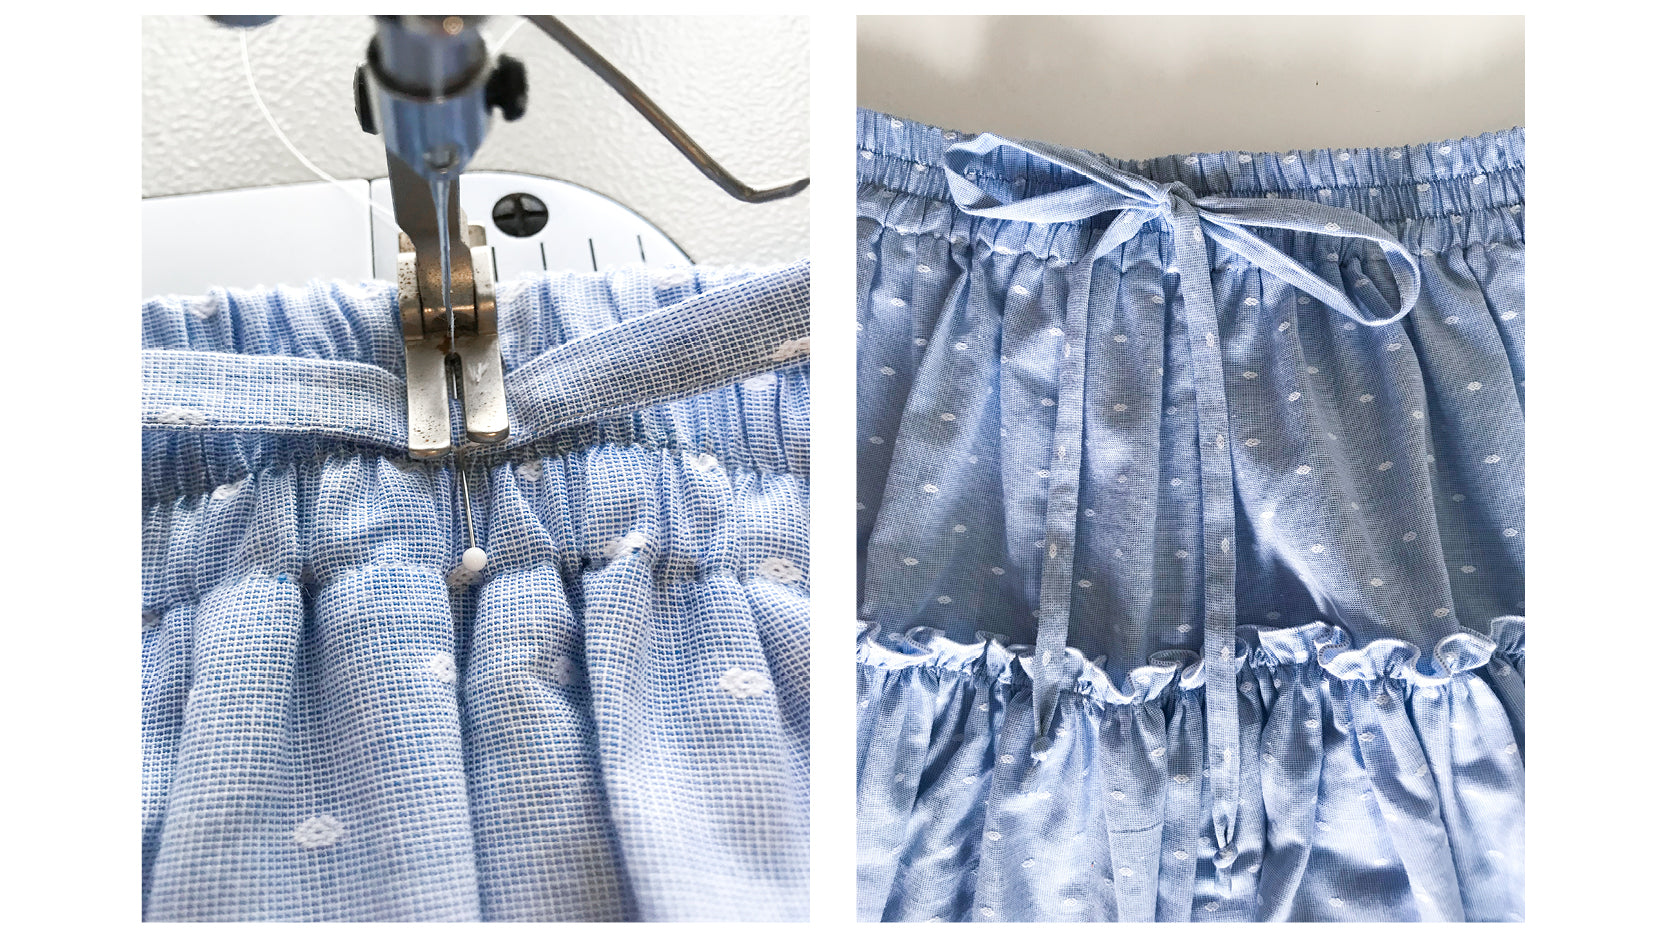
5. Place elastic under the folded waistband. Sew waistband down by stitching through the center of the overlocking. You will need to be slow and pull the elastic through as you sew.
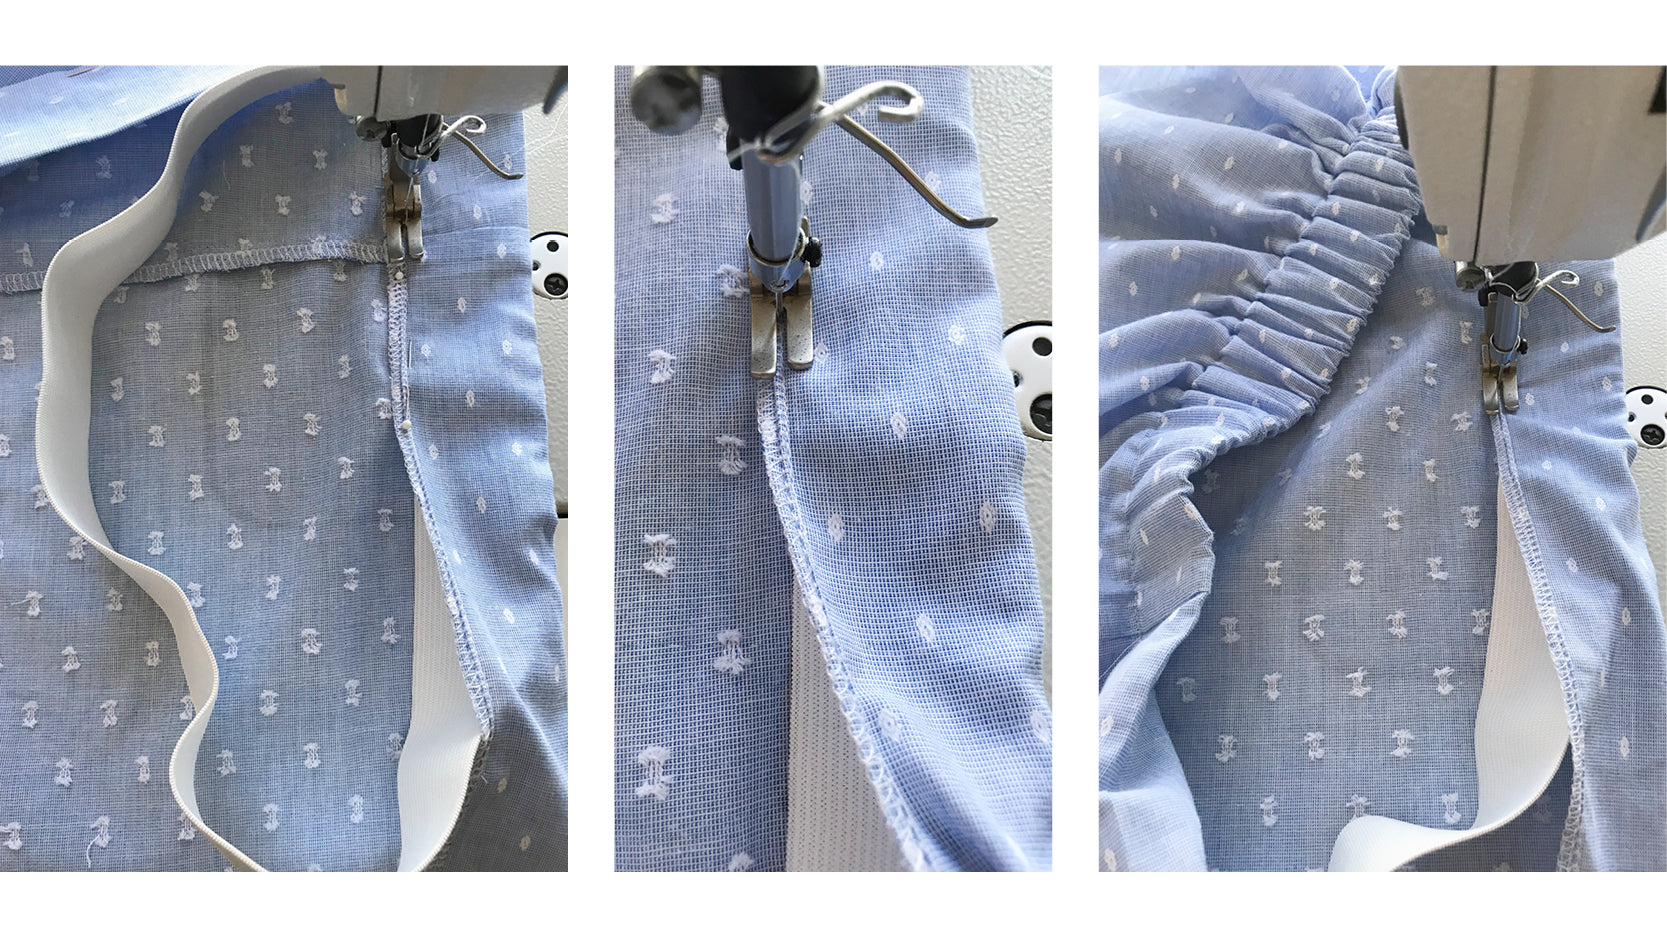
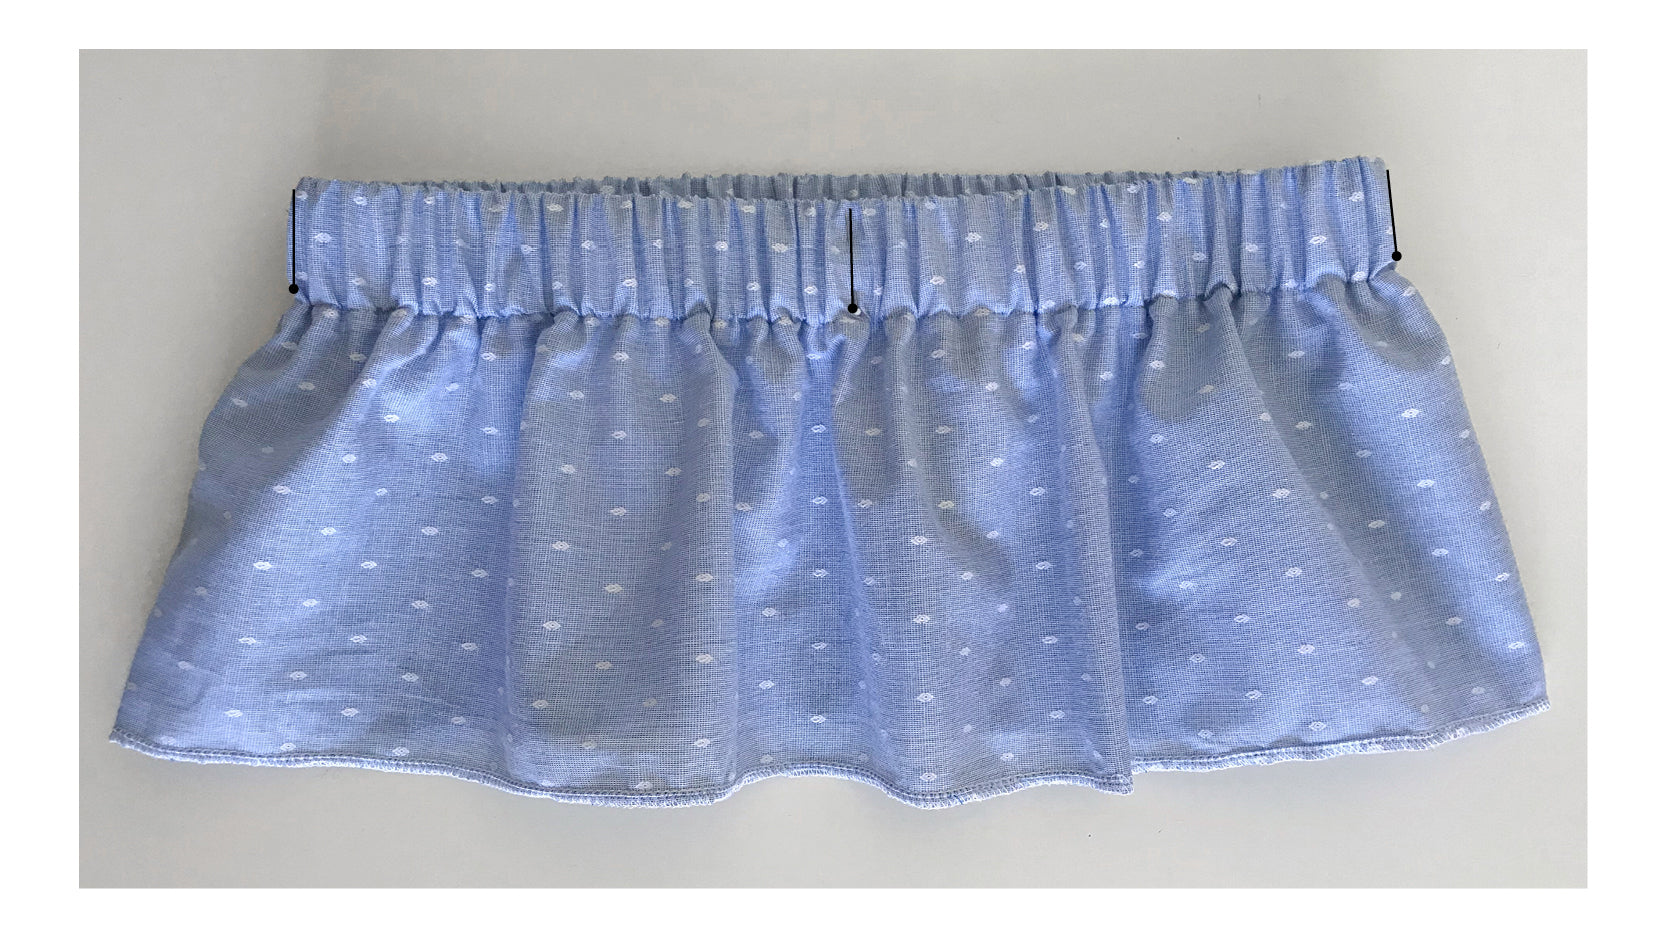
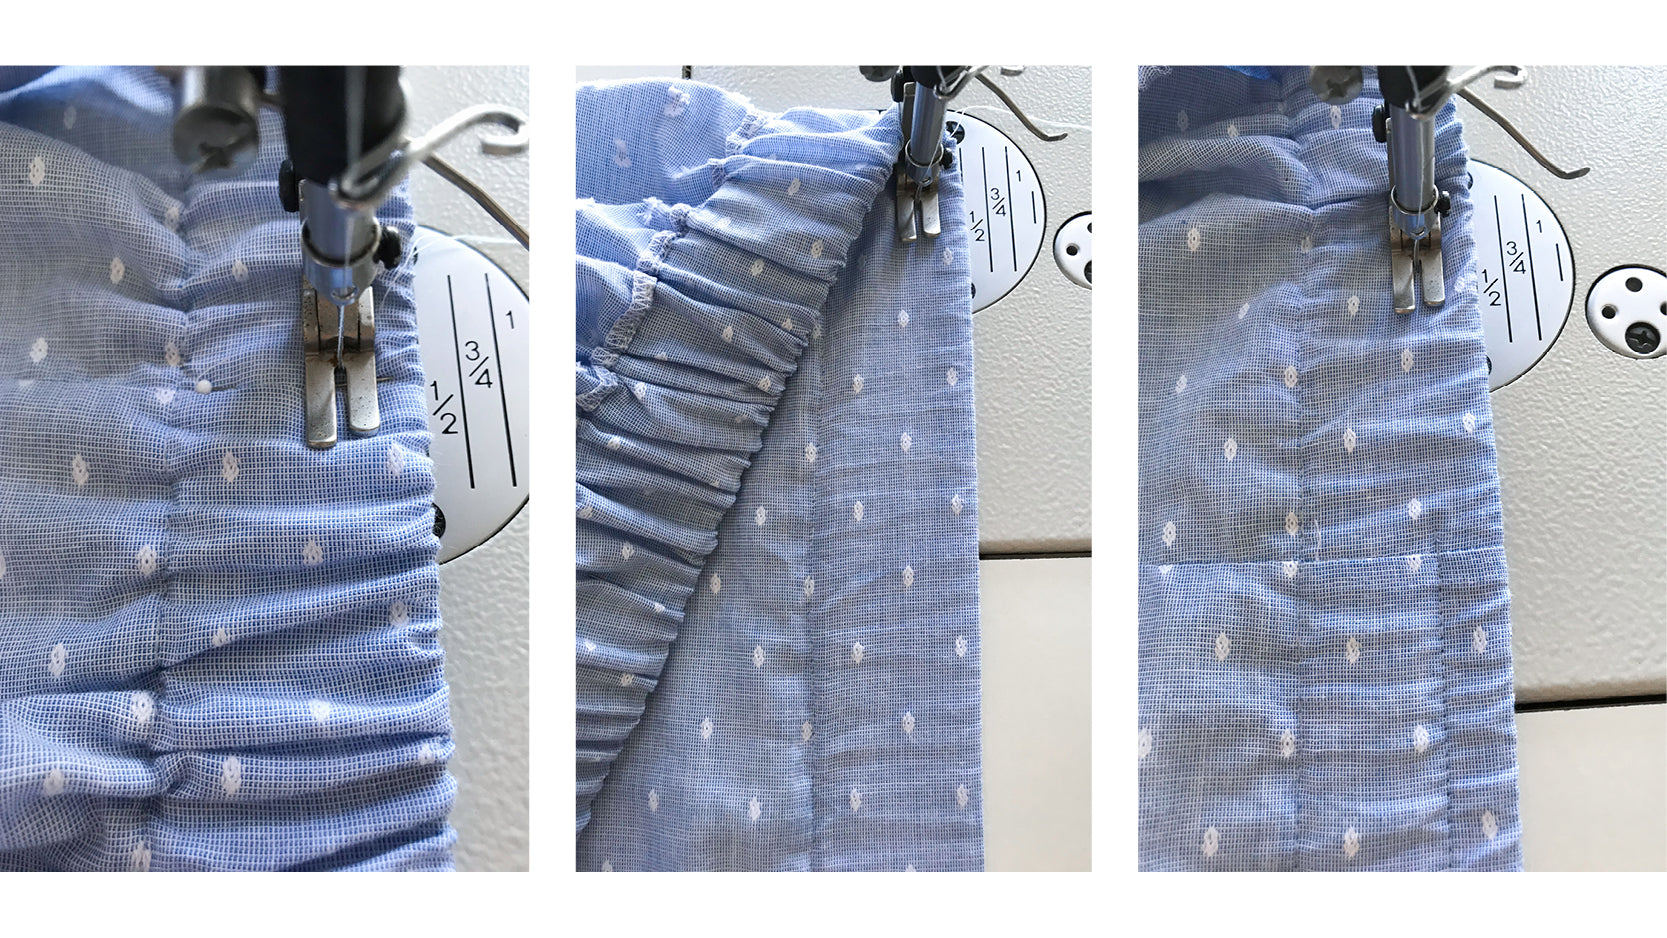
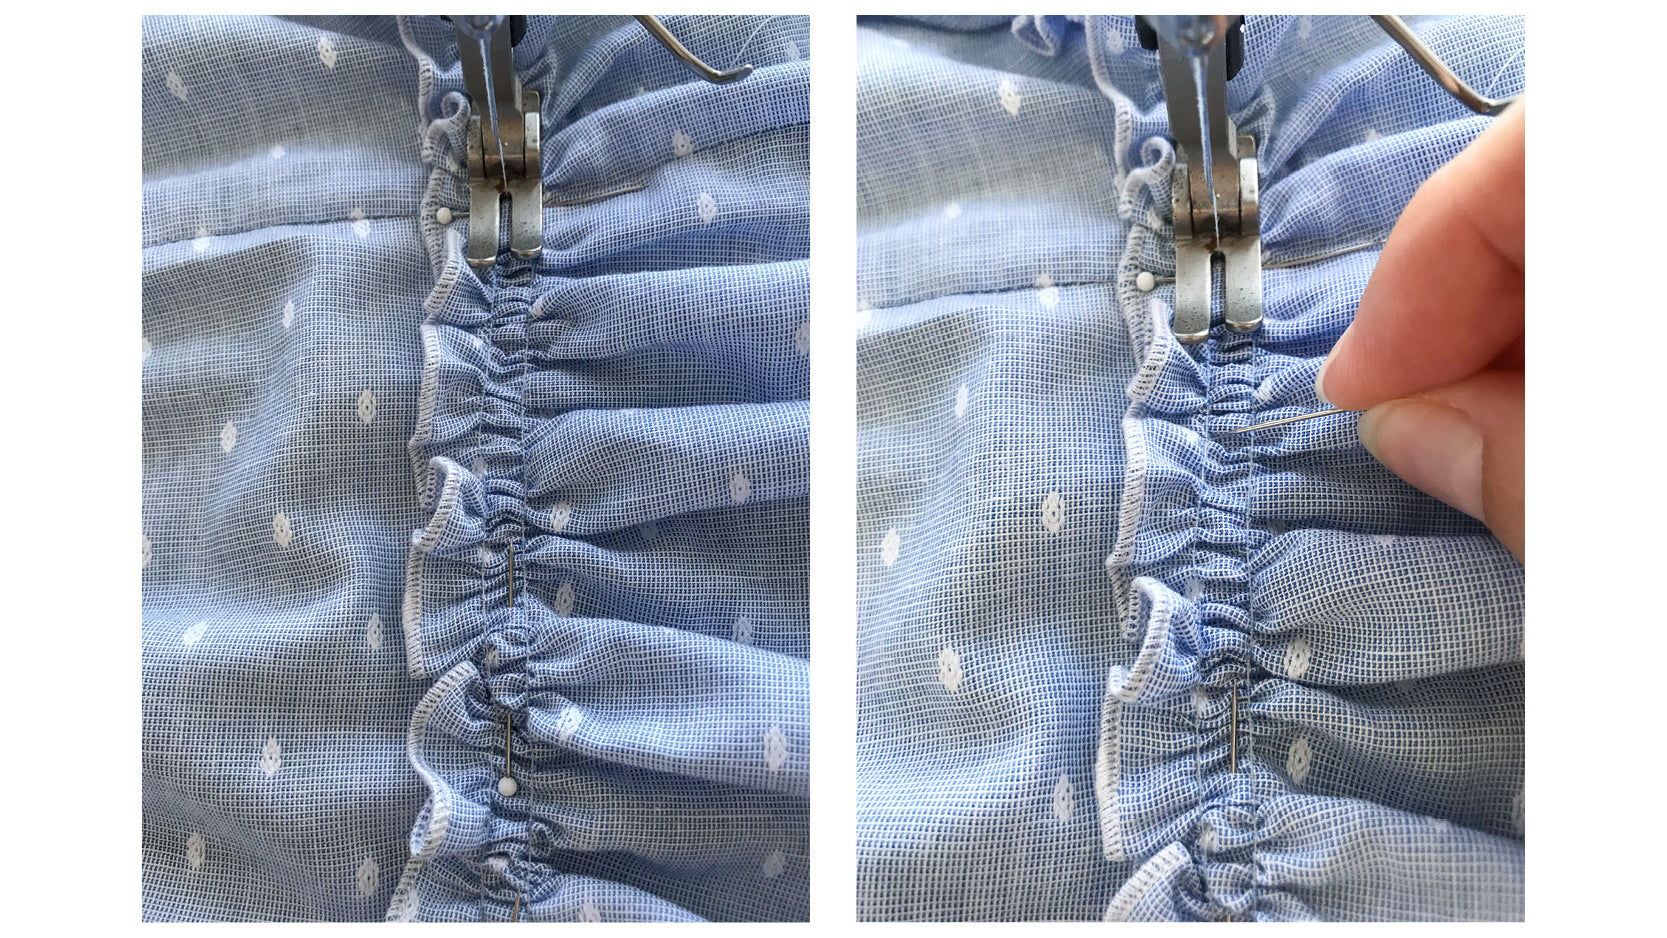
6. Putting your hands on the inside of the waistband pull gently out and in to spread the gathers evenly. When you think the gathers are even, place a pin at each side seam, center front and center back. Ensure pin goes all the way through the waistband catching the elastic.
7. Using a ruler measure the distance from the top of the waistband down to your row of stitching. Divide this into three and find a line on your sewing machine plate which lines up. Sew your first top row of stitching around the waistband. You need to pull the elastic waistband as you sew from the front and behind the needle so you are sewing on a smooth waistband. Just do a quarter of the waistband at a time until you reach a pin. Remove each pin as you reach it.
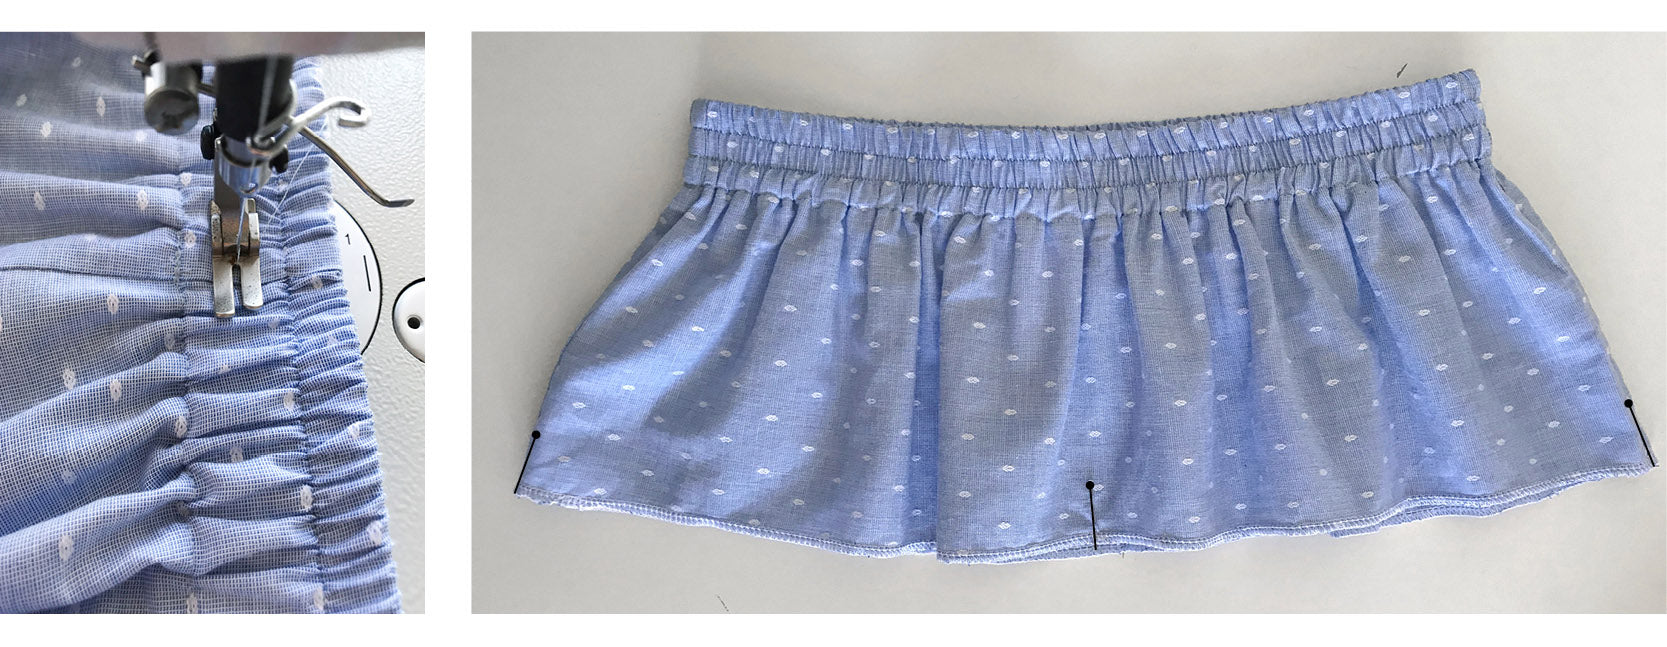
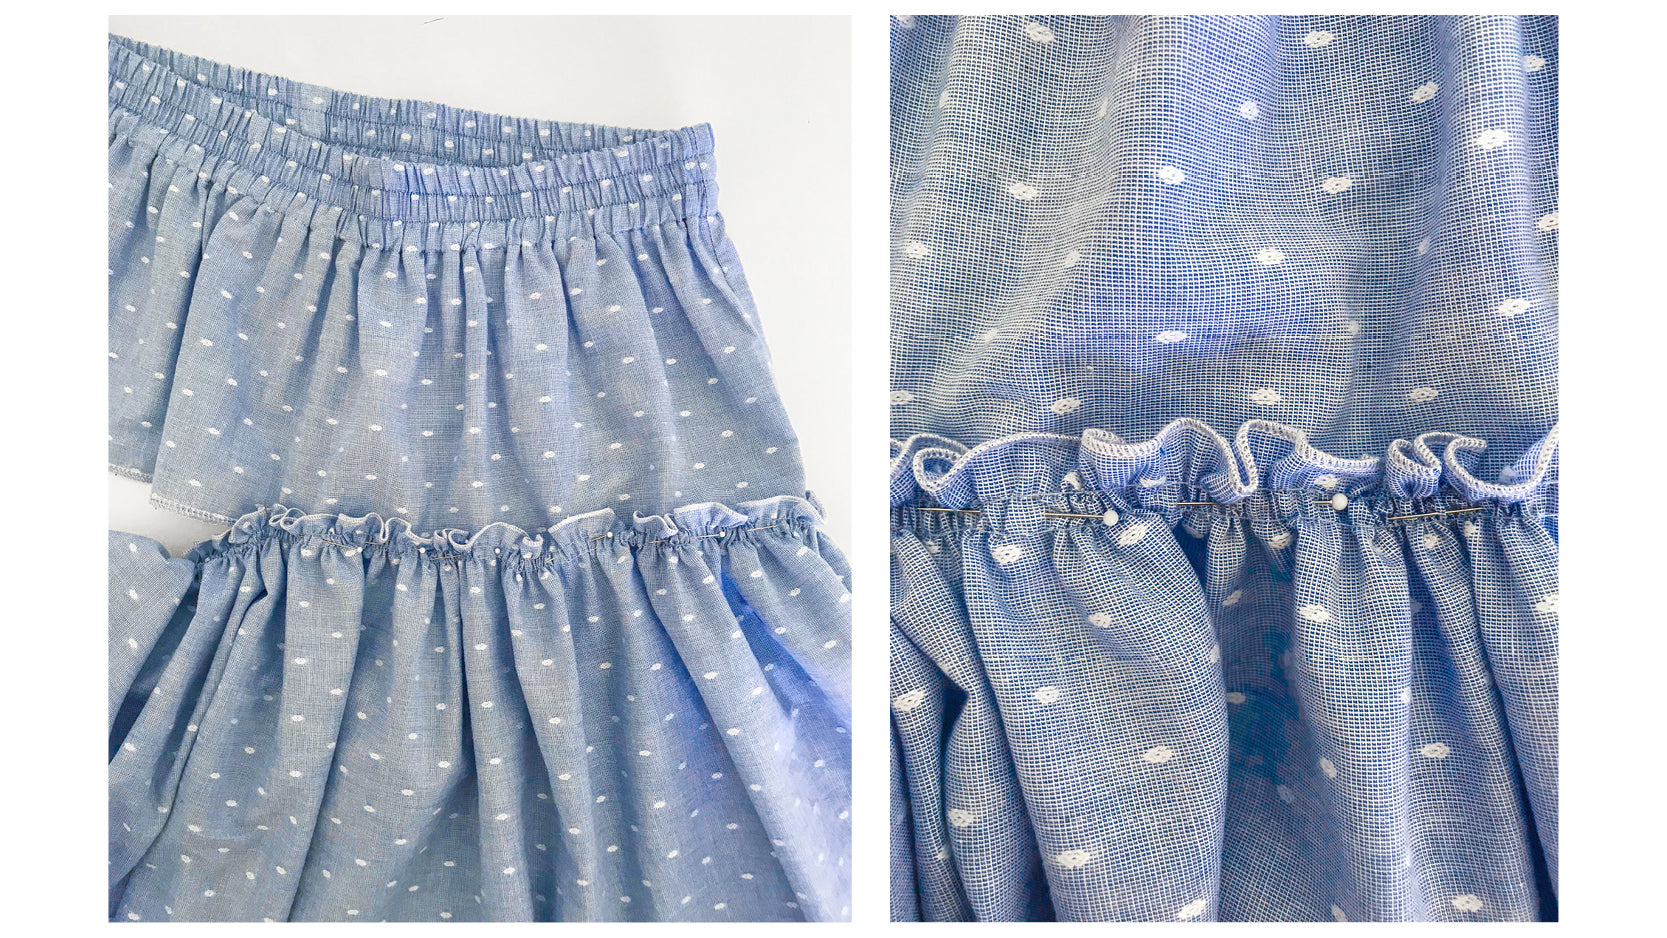
8. Lining your presser foot up in the center of the lower section of your waistband, sew another row as you did in step 7. Then, place a pin at each side seam, center front and center back of the bottom of the skirt as shown.
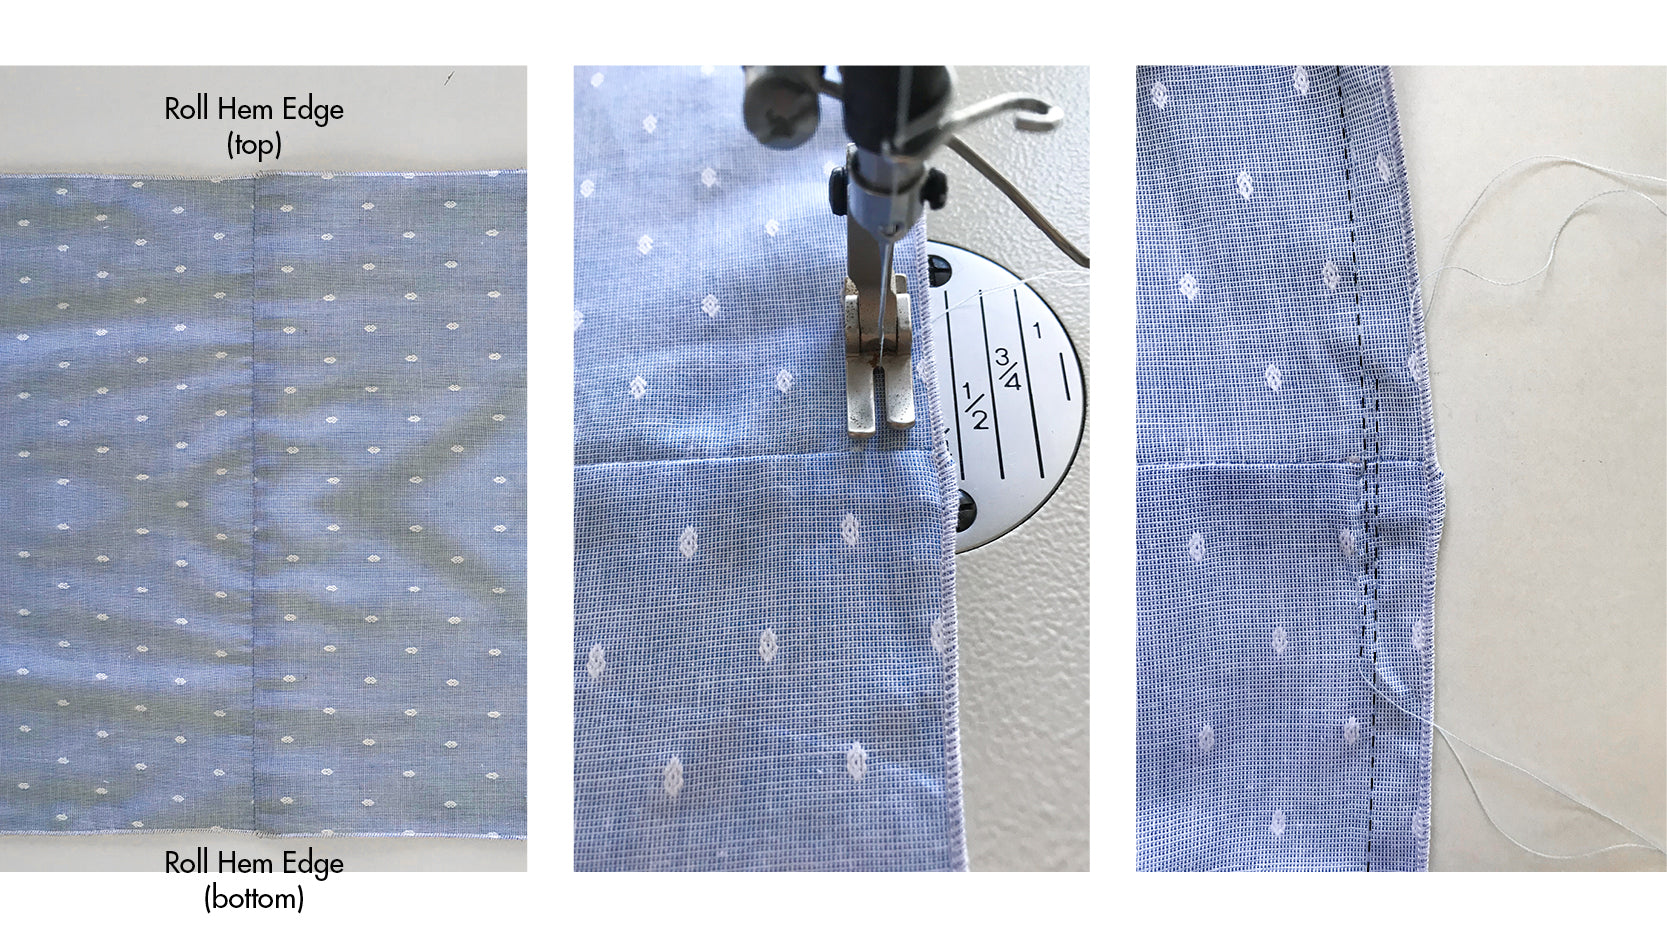
9. Take the Bottom Skirt Piece (2) and roll hem both long raw edges on your overlocker. Then turn your sewing machine stitch length to the longest setting. Place your needle into the fabric at 1cm in from edge and approx 2cm up from side seam, begin sewing your gather stitch row. Sew all around the edge, when you come back to the starting side seam sew past the side seam by approx 2cm. Ensure you do not sew over your stitch lines. Do not trim your threads too short.
10. Now you need to sew another row of gather stitch. Place your needle in the fabric 2cm above the side seam with the presser foot in line with your first row of stitching. Sew around as you did before, ensuring you go past the side seam again and ensuring you do not sew over any previous stitching. Then, place a pin in each side seam, the center front and center back. Begin gently pulling up your gathers by grabbing both threads from one side.
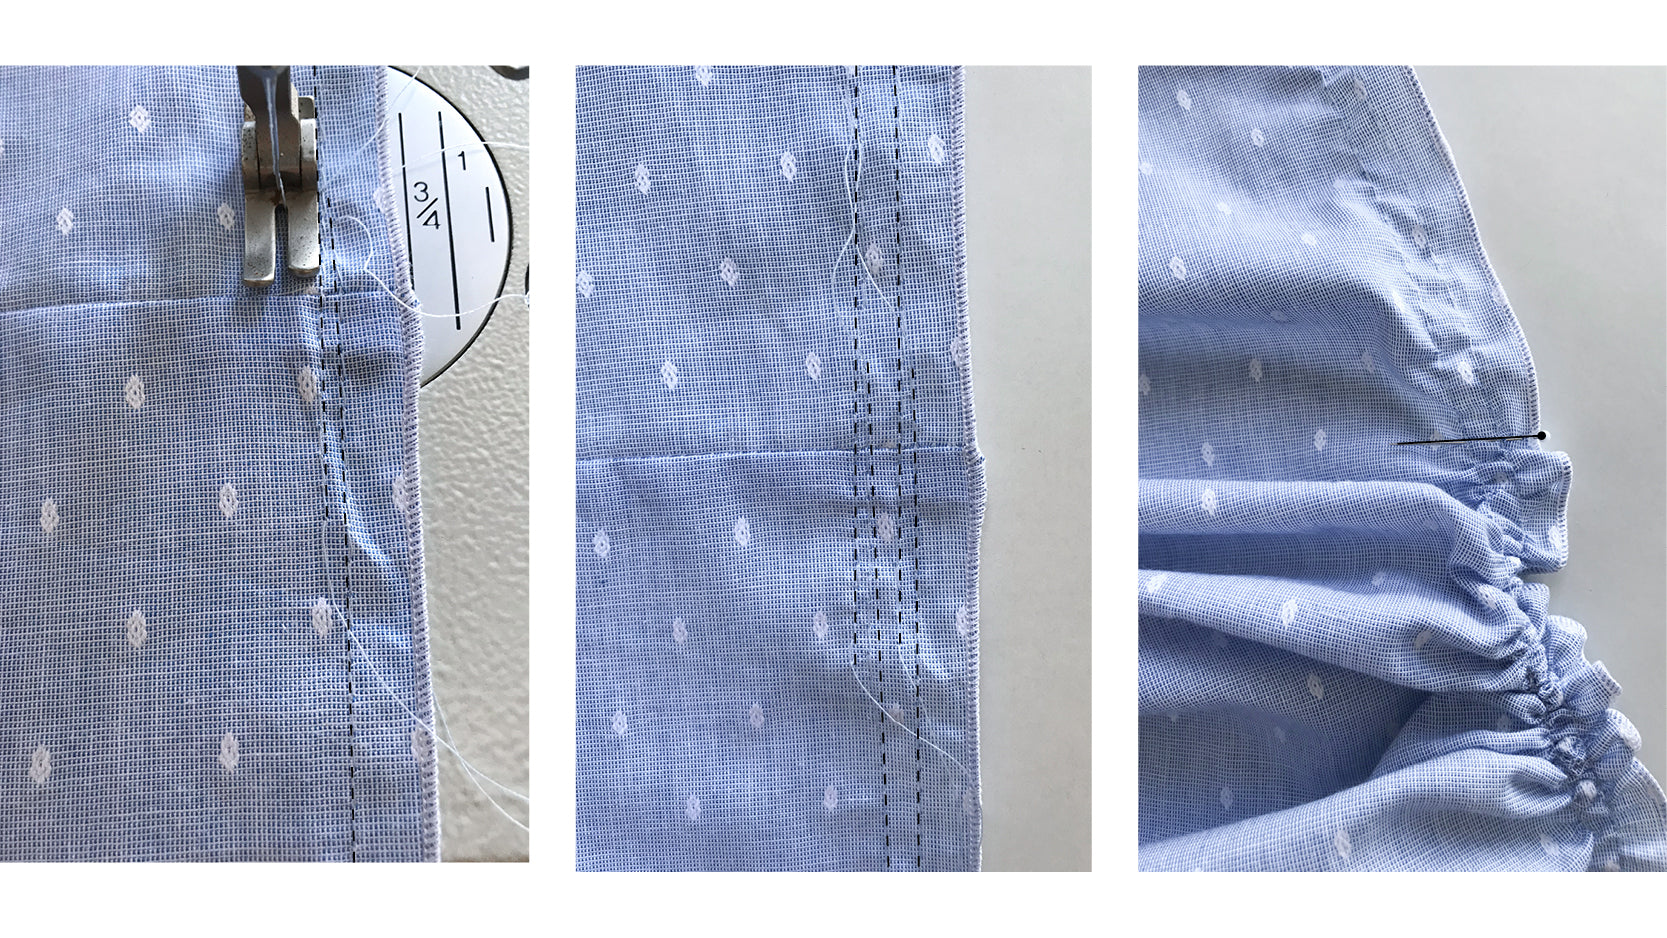
11. It is easier to let some gathers out so gather it slightly tighter than it needs to be. Once you have gathered your Bottom Skirt Piece (2) do not trim the threads.
12. Lining up your pins from the Top Skirt Piece (1) to the Bottom Skirt Piece (2) you will begin pinning the skirts together. Start at the opposite side seam to the loose gathering threads. The Bottom Skirt Piece (2) sits over the top of the overlocking on the Top Skirt Piece (1) by 1cm. This is tricky so just work on one quarter of the skirt at a time, pinning down the center of the 2 rows of gather stitch. Let out the gathers as you go so it fits perfectly onto the Top Skirt Piece (1). Work slowly and check each pin is attaching the Top Skirt Piece (1) underneath the gathers.
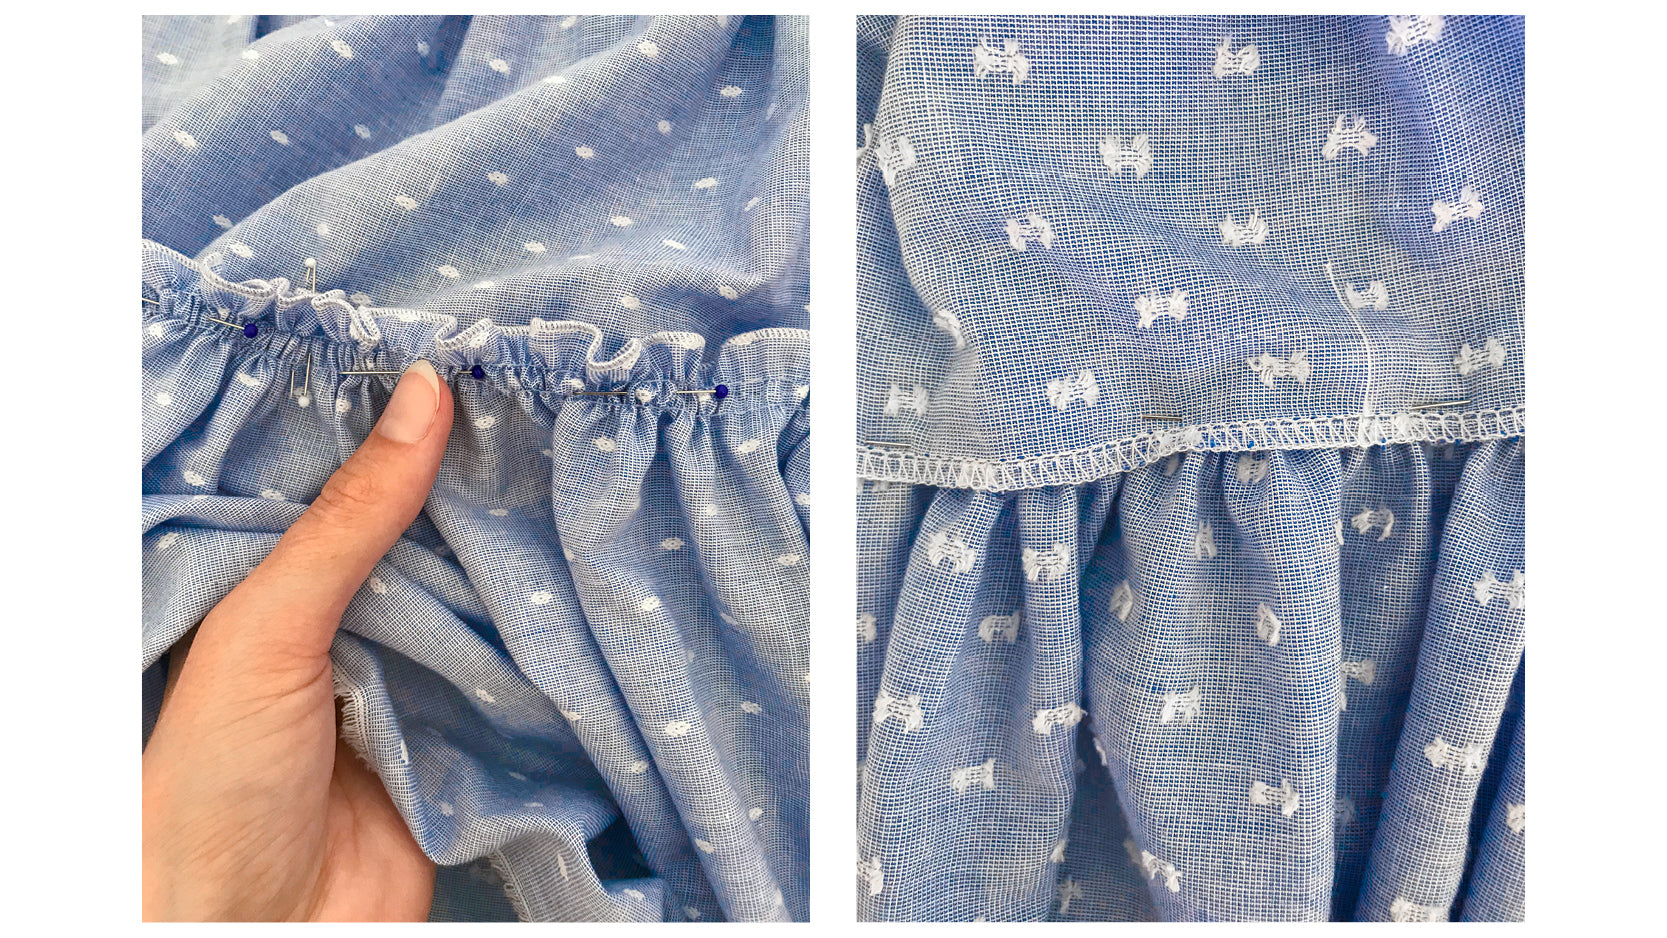
13. Once you have pinned around the entire skirt and checked the pins have attached the two skirts properly, you will sew them together. Return your stitch length to normal. Place the skirts under the machine as shown and sew down the center of the 2 rows of gather stitching. As you sew, use a pin to push and even out the gathers between each pin. Do not trim any threads until the entire bottom skirt is attached to the top skirt.
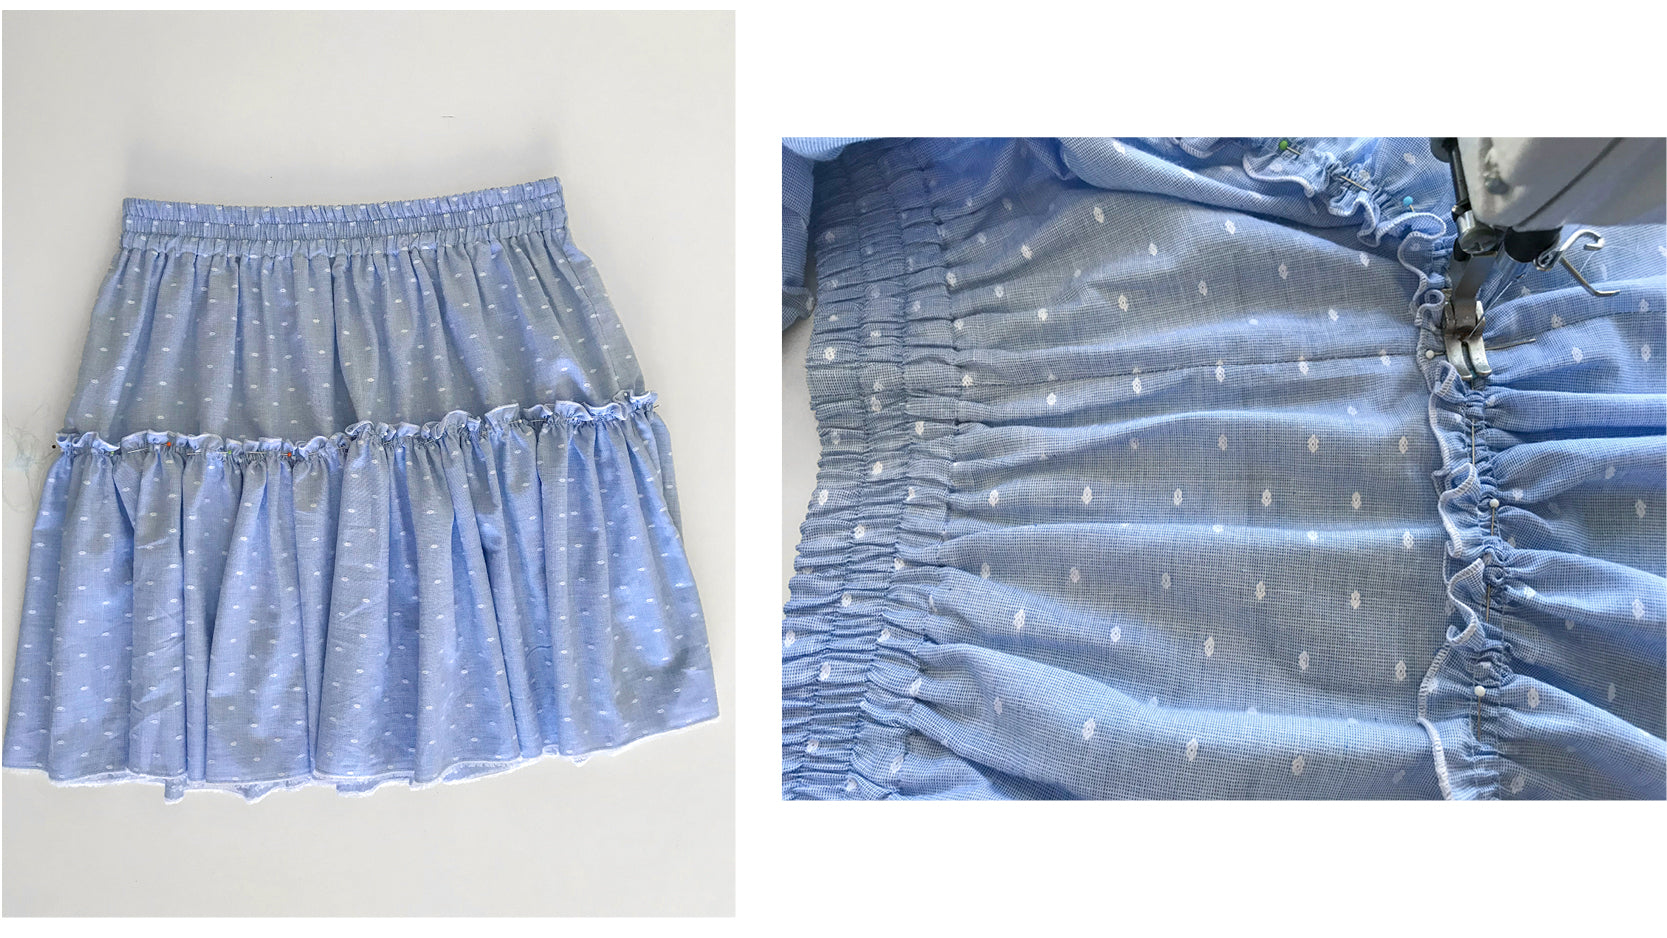
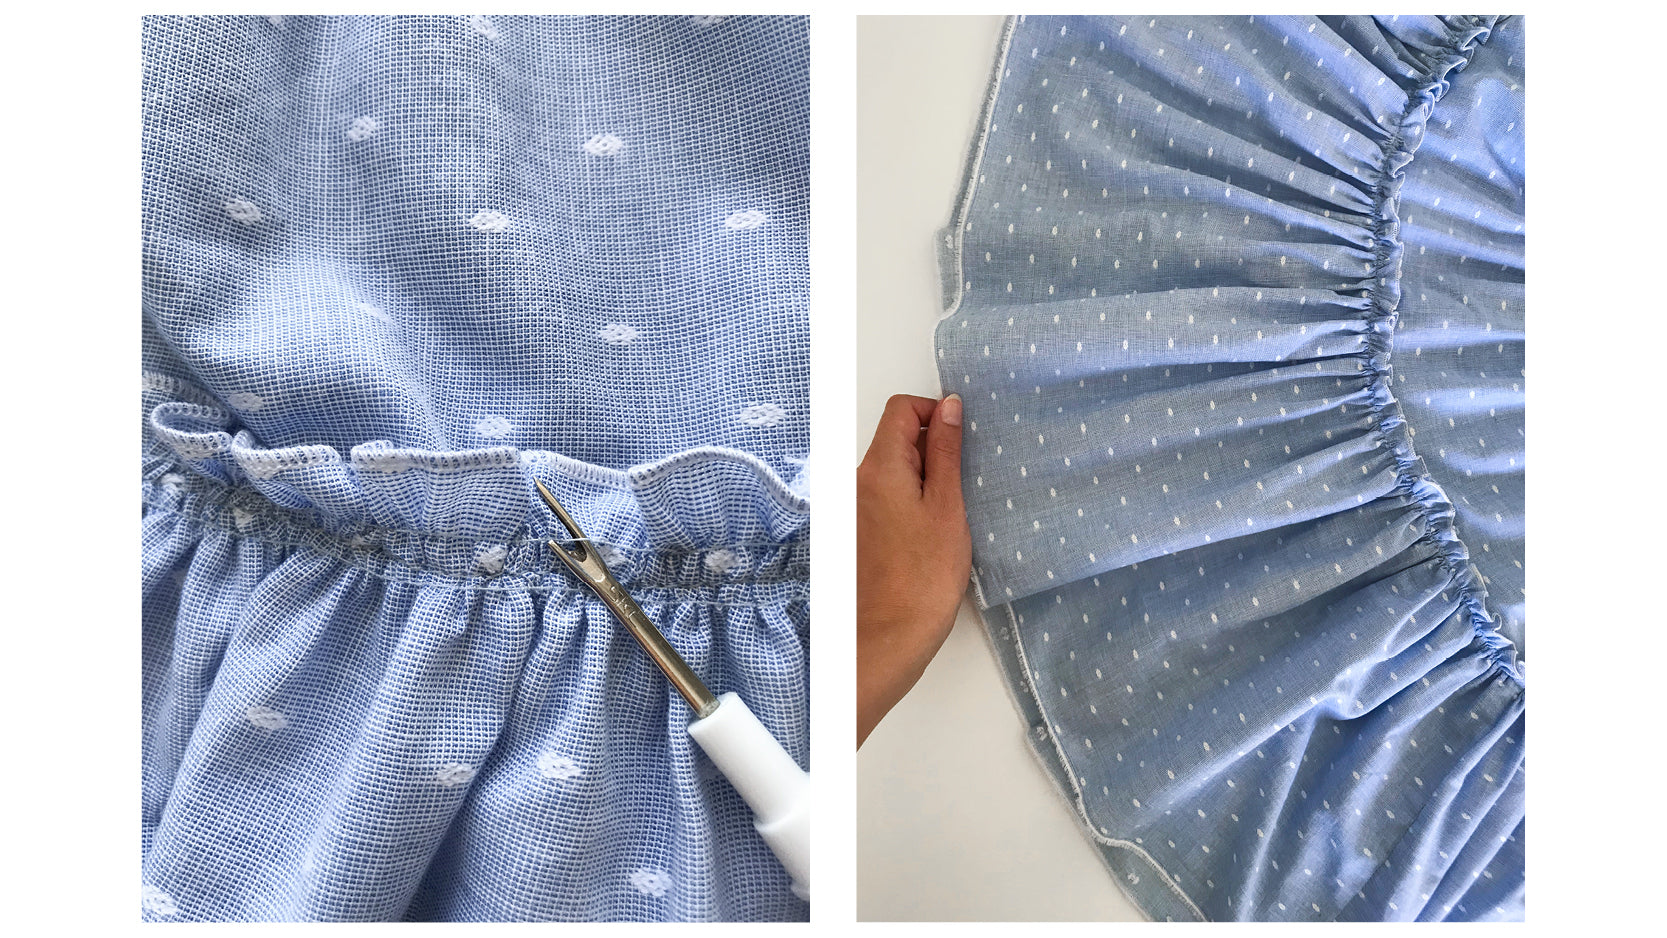
14. Using an unpick you can now pull out the 2 rows of gather stitching. Then, pulling the hem of the Bottom Skirt Piece (2), steam the skirt and gathers gently, from the hem up towards the waistband. Do not actually iron it flat just steam and hold the iron to touch lightly whilst steaming.
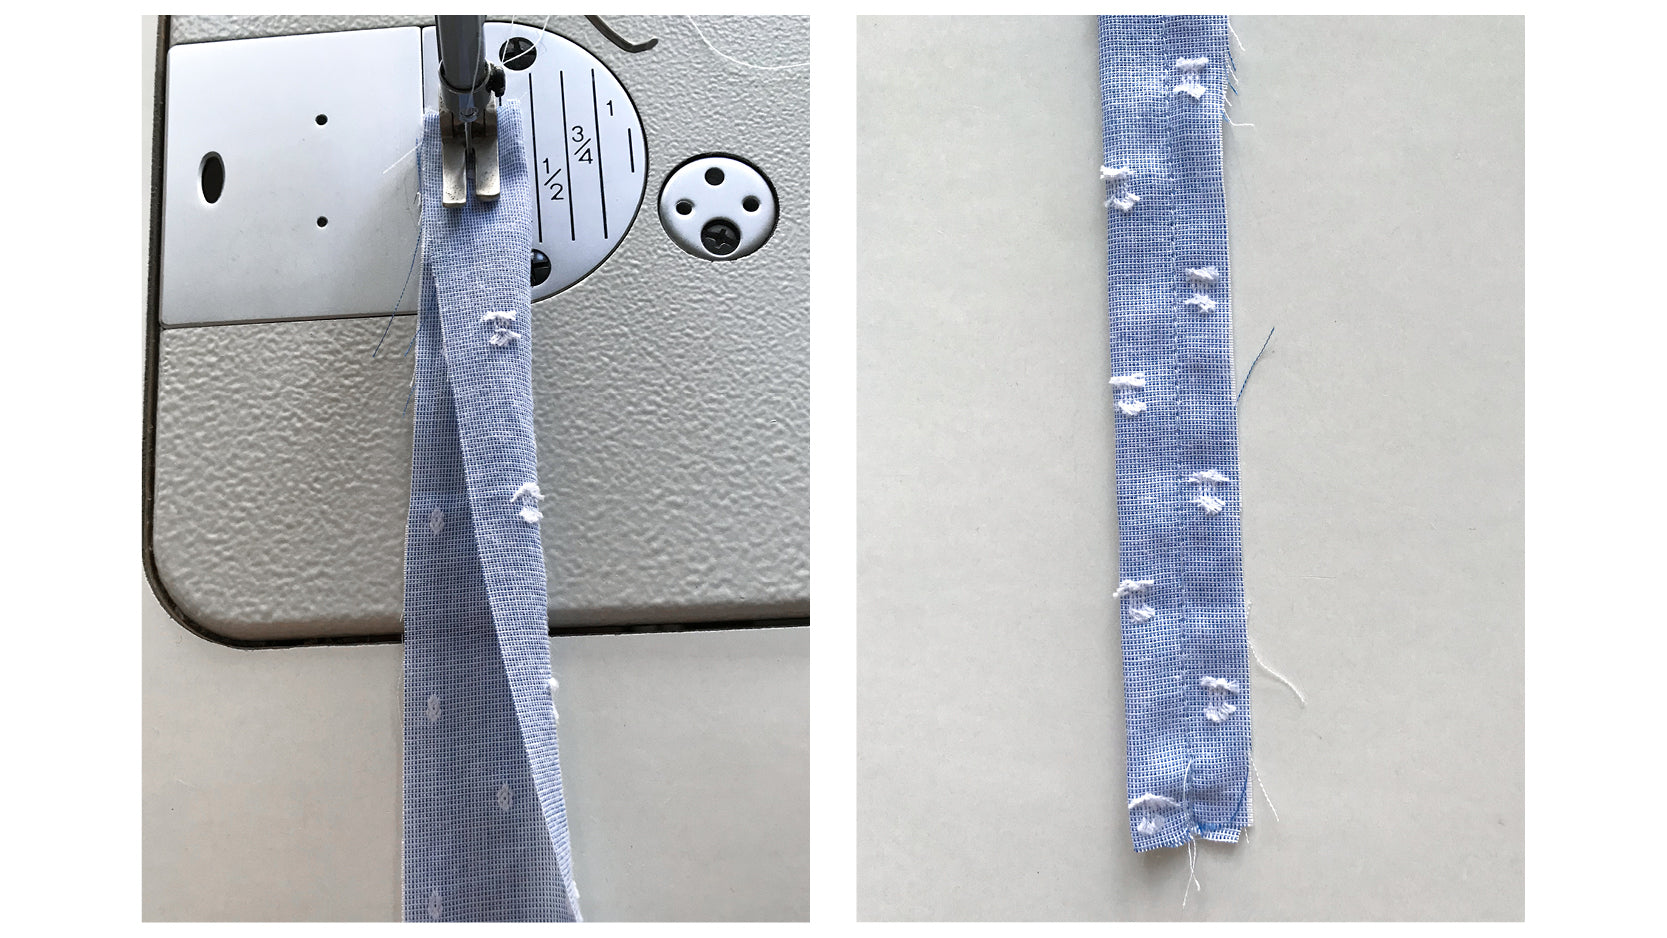
15. Now to make the tie. Folded over, with right sides together, sew down the long side of the tie with a 1cm seam allowance.
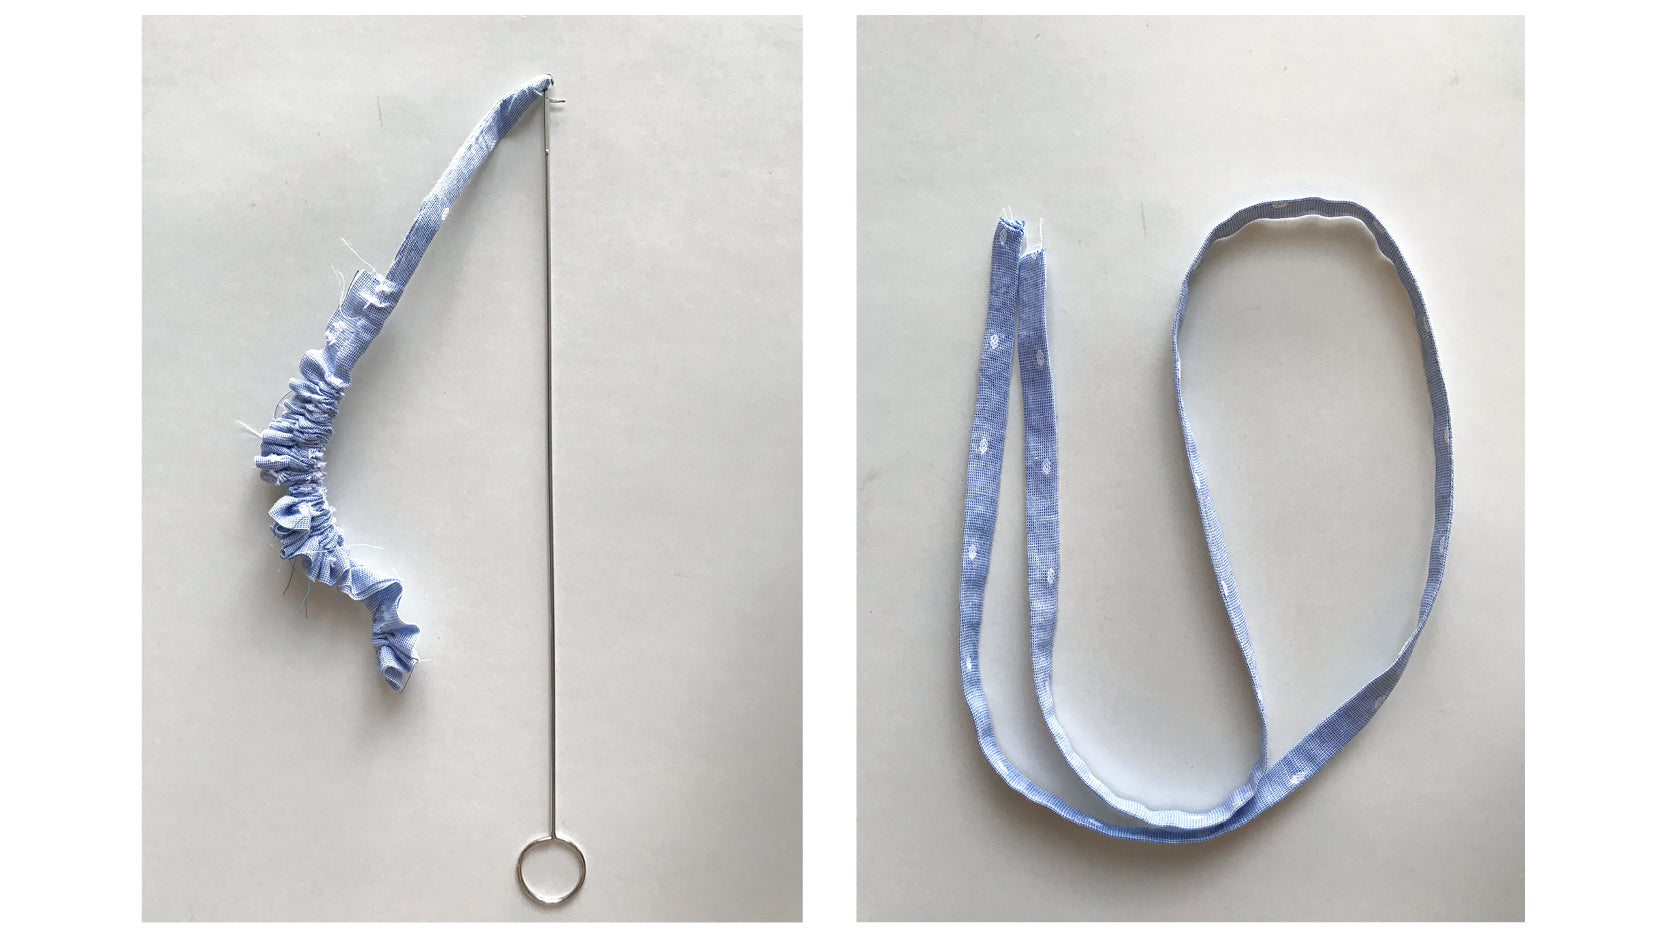
16. Using your loop turner, pull the tie to the correct side out. Then, iron flat with seam close to one edge.
17. Find the middle of the tie and the center front of the skirt. Line the middle of the tie up centered in the waistband and sew down. Tie the tie then knot the ends. Voile!
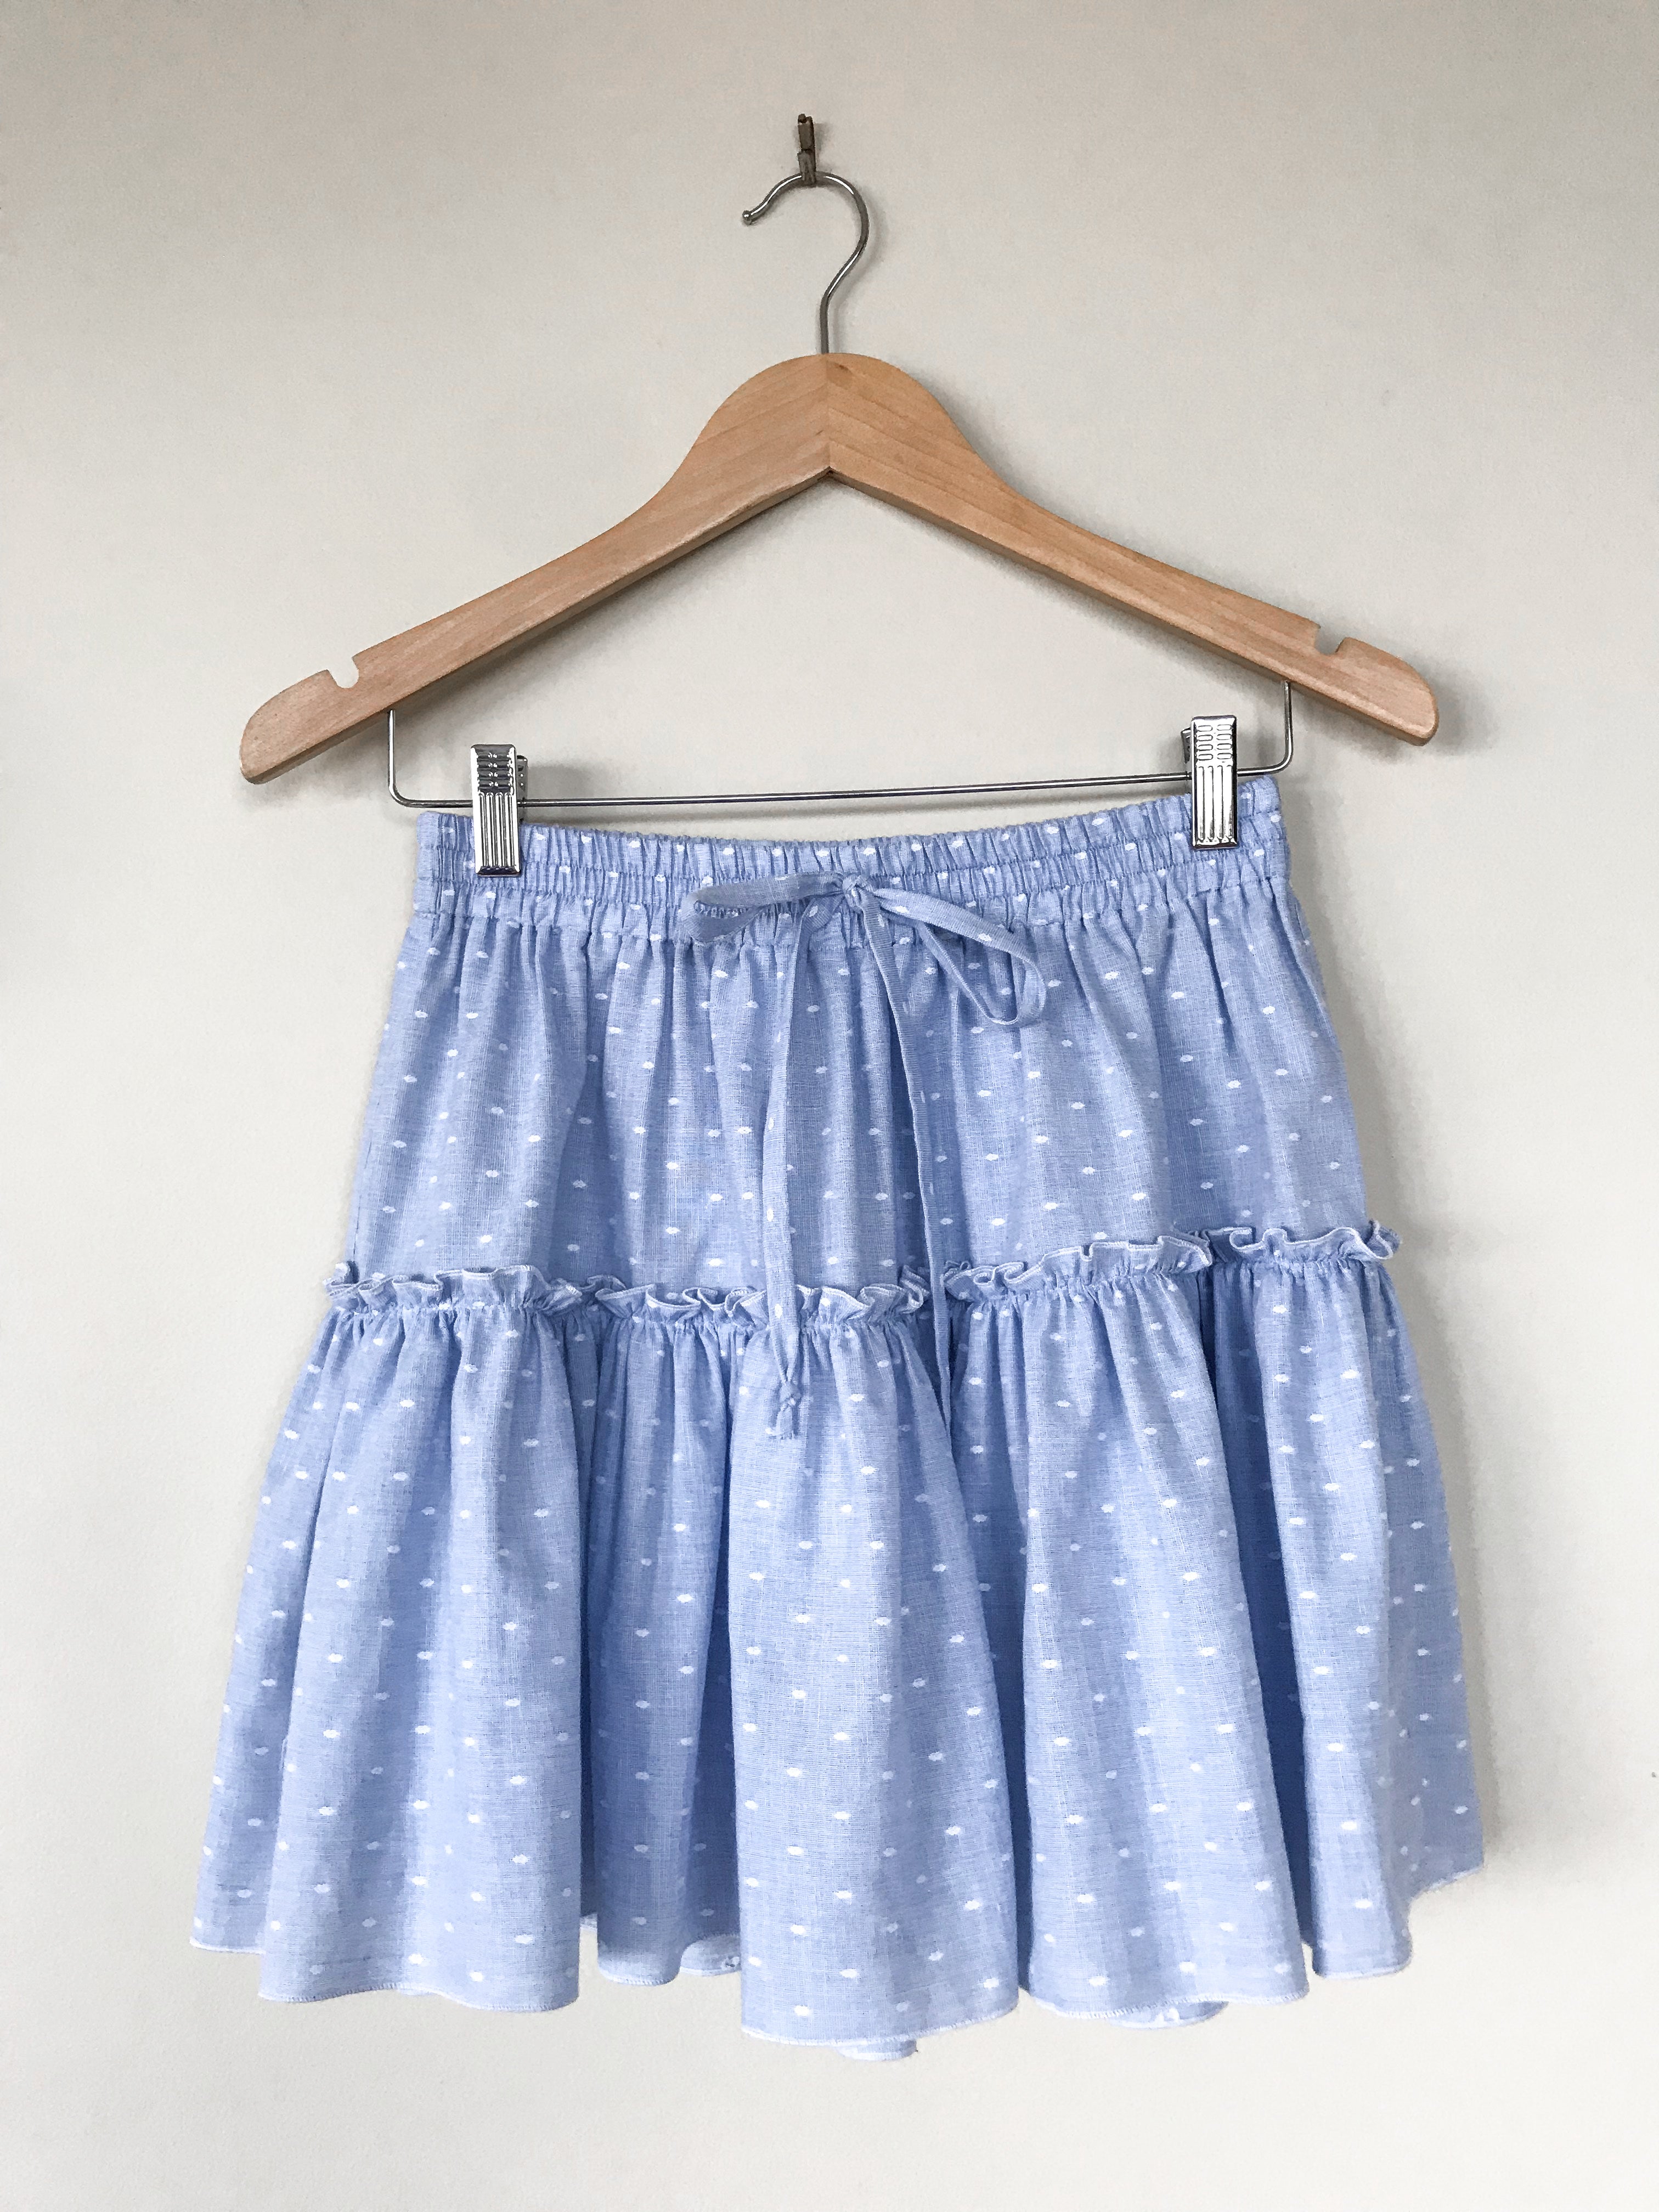
All Finished!
If you have any issues or questions, please email me: kimberley@thehemming.com
Don't forget to tag #kamiskirt on Instagram